By default, the Cloud Edition Console served over HTTP through an Elastic Load Balancer. It is possible to configure the ELB to provide the access over SSL as well. This will cover the basic steps involved. For more detailed instructions see the AWS documentation for configuring a load balancer with an HTTPS Listener.
Step 1
Create a domain for the ELB. You will need a domain name for your server certificate. To do this, you'll need to create (or request) a CNAME record pointing to the domain of the ELB created in the CE stack. The ELB domain can be found in the ELB console, in the Description tab:
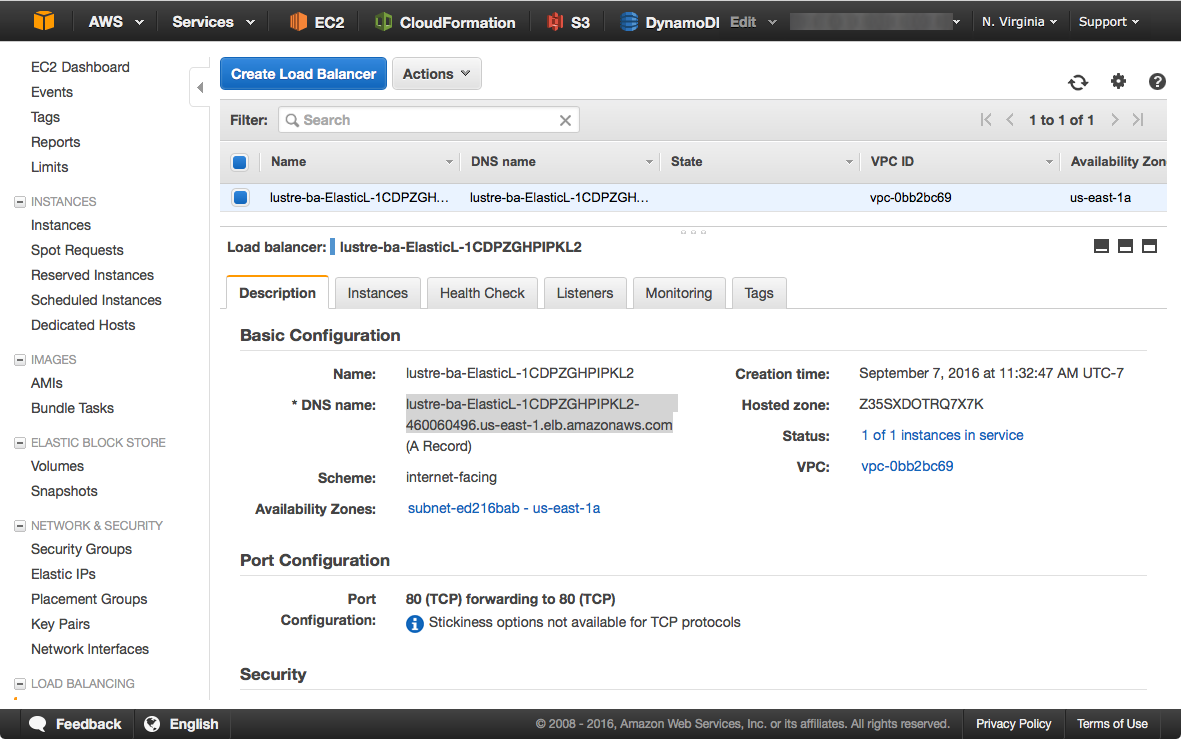
Once the new domain is created, you can access the console using "http://<your domain>". It make take from several minutes to several hours for the new domain records to propagate, so it is good idea to test this first before proceeding.
Step 2
Create the server certificate and key, using the domain created in Step 1 as the Common Name for the certificate.
For test purposes, this will create a self-signed (insecure) SSL certificate using OpenSSL:
openssl req -x509 -newkey rsa:4096 -keyout key.pem -out cert.pem -days 1001 -nodes -subj "/CN=console.example.com
This method is only suggested of test purposes and this certificate should not be used for production.
Step 3
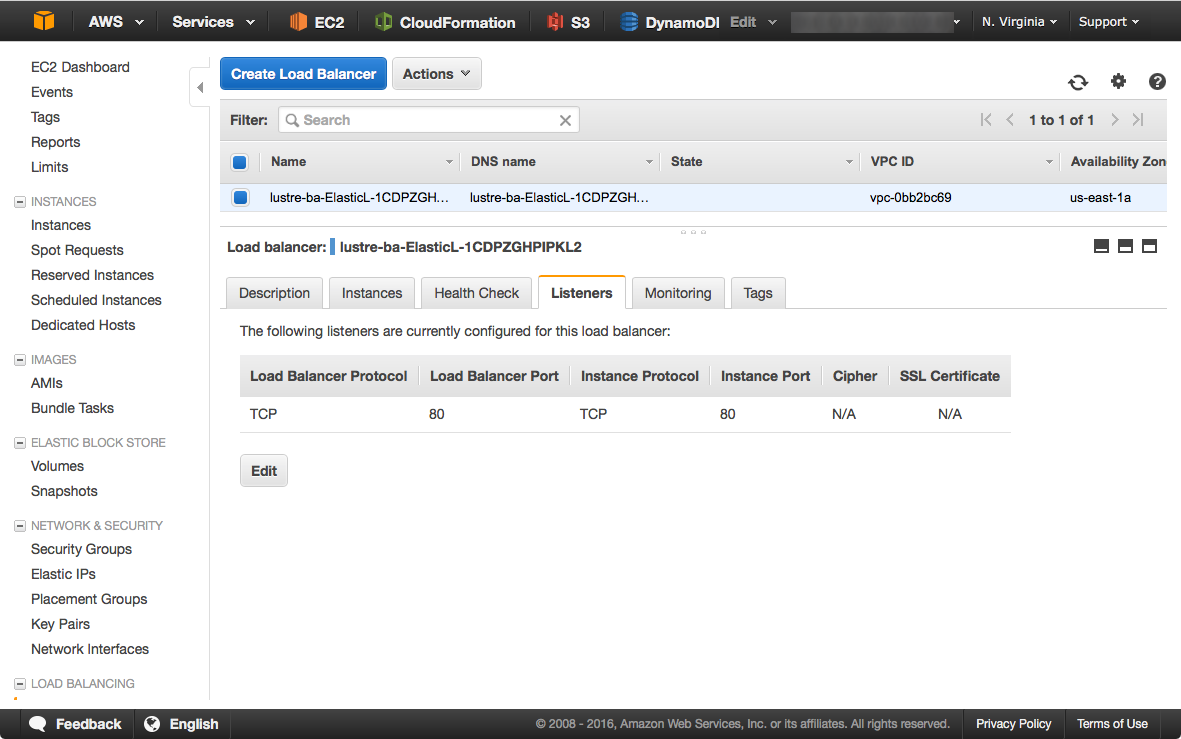
Finally, you can add an HTTPS listener to the Lustre ELB using the new certificate and key. Go to the ELB Console and select the Lustre ELB, and then select the Listeners tab.
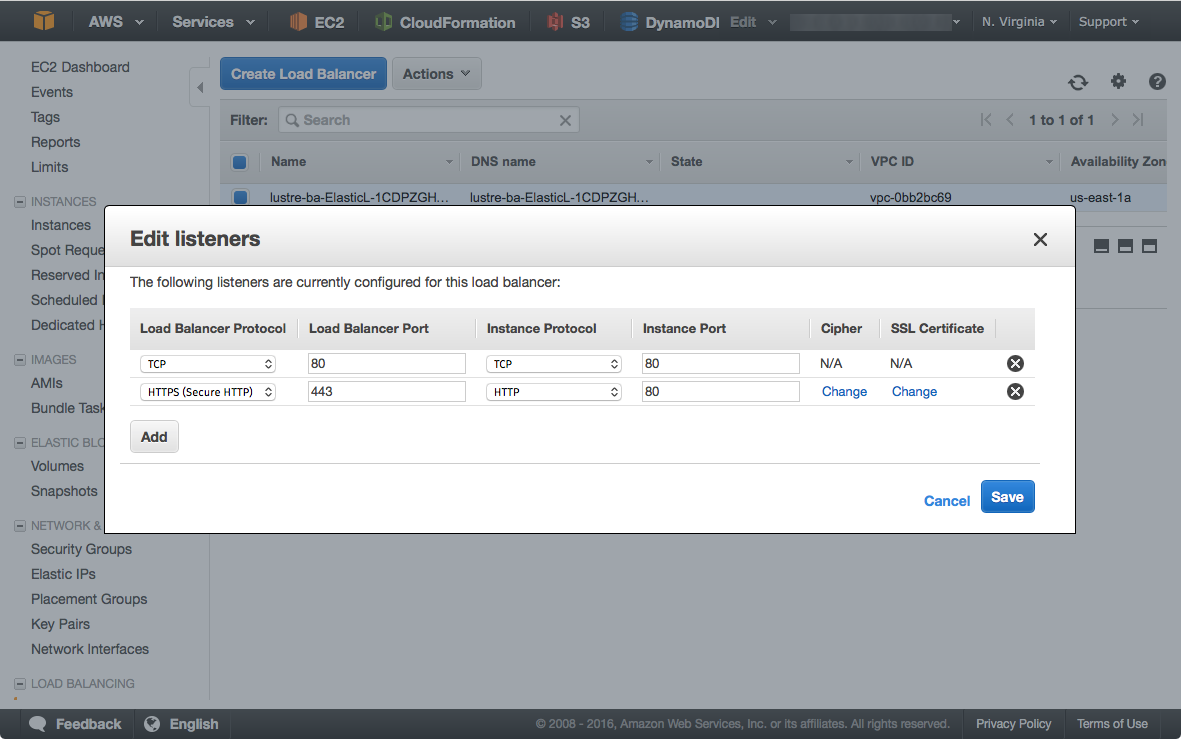
Click on the Edit button in the Listeners tab. In the popup window, add a new Listener and choose HTTPS in the Load Balancer Protocol field.
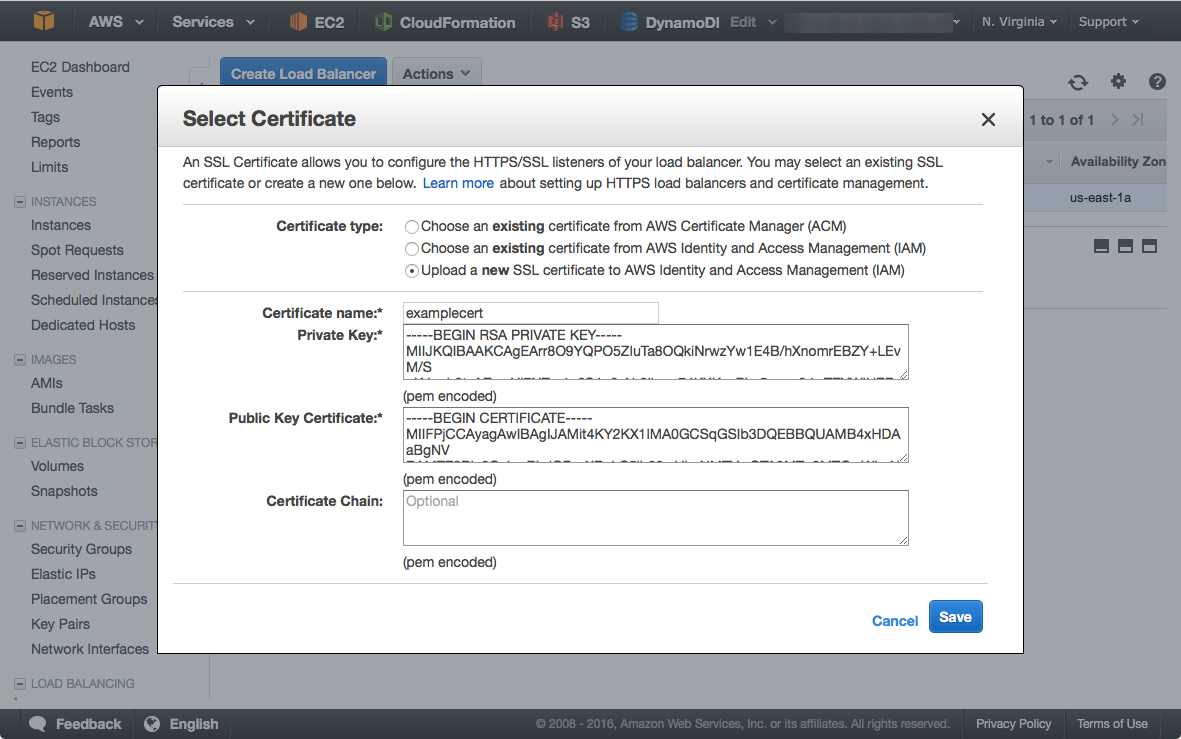
Click the "Change" link in the SSL Certificate column to open the edits window for adding a certificate. Choose "Upload a new SSL certificate..." option, and fill in the Certificate name field with your name for this new certificate. Then copy and past the PEM encoded private key and certificate into the appropriate fields. The Certificate Chain is optional and may be provide by a certificate signer when you have a secure certificate created.
Finally click save and then click save in the edit window. Once the HTTPS listener has been created successfully, you will be able to use "https://<your domain>" to access the CE console.
Overview
Content Tools