Page History
...
If you already have clients that you would like to mount your new Lustre Filesystem to, see Cloud Edition for Lustre software - Client Setup for instructions on using the ce-configure command to setup your clients for Lustre access.
You will first need access to the hpdd an AWS account. Follow the instructions to setup access to the AWS account
You will need an SSH key for ssh access to your cluster. So create a public and private key and place it on your system.
...
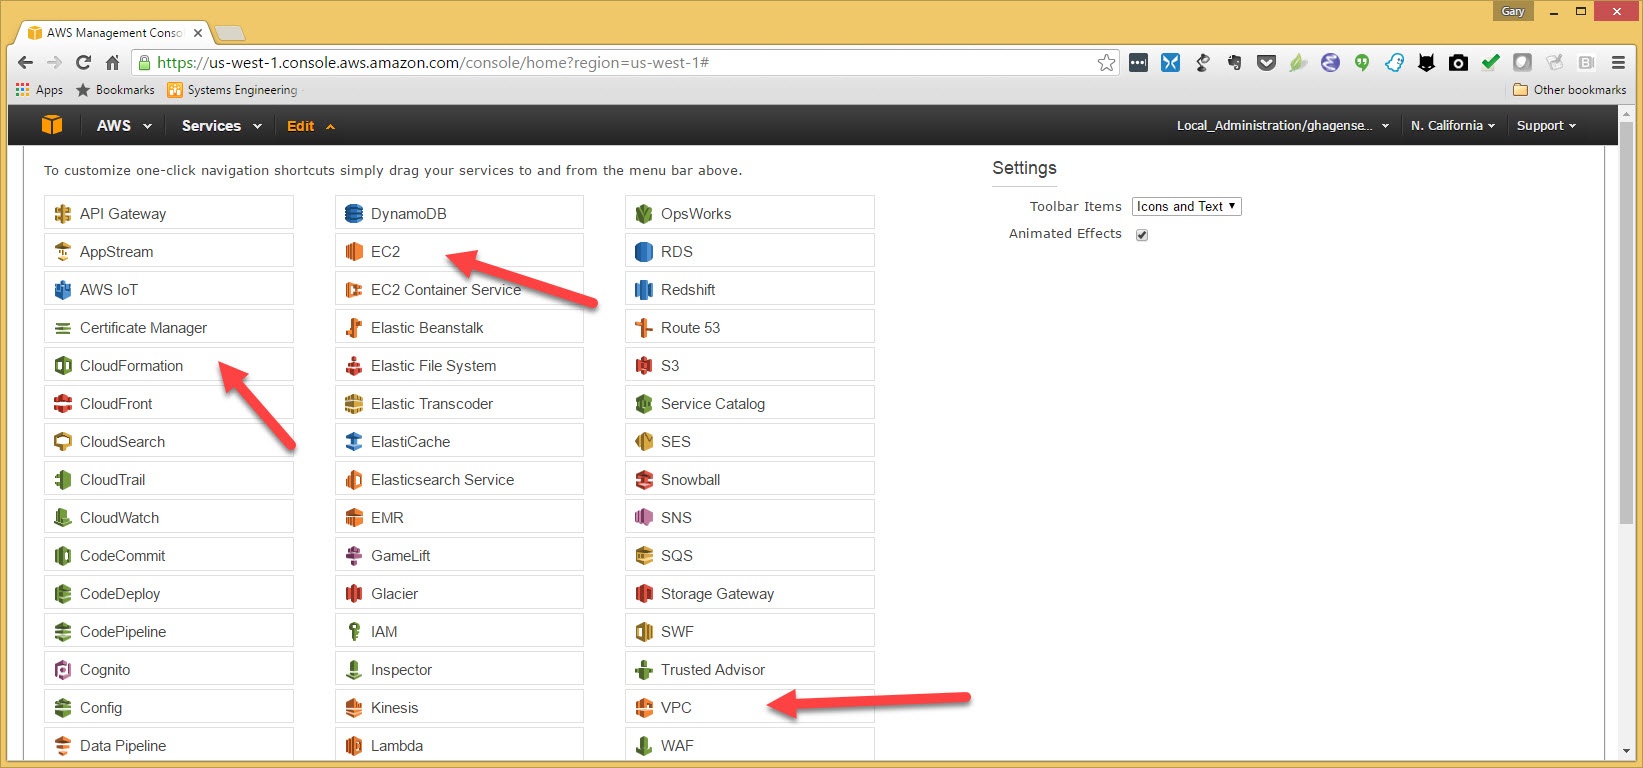
Once you have your access then login and you will see the following screen. To make it easy, hit edit and move some things to the access bar

Hit edit and drag and drop EC2, VPC and Cloud Formation to the access bar (after "services" and before "edit")
Now the access bar will look like the following. The first thing to do will be to create a key pair for accessing our cluster once it is created.
So click on "EC2"

On the EC2 dashboard, look for "Key Pairs" in the left panel under "Network and Security"

Then Chose "Import Keys" and upload an OpenSSH compatible public key. The template we will run later will put this public key in all instances it creates.
...
However if you load your private key into puttygen you can cut an OpenSSH compatible key from the box shown here and paste it into the import key box. Give your key a unique name that you can remember.

Now we see our key which we named "aws-demo" listed as a key pair. We will use this later when we create our cluster.
The next thing we need to setup is a VPC (Virtual Private Cloud). We will use a AWS wizard to do this. Start by choosing "VPC" from the access bar.

Click on "start VPC Wizard" to create our VPC.

Choose the first option on the right "VPC with a single Public Subnet" and click "Select"

Fill in the address range you would like. You should not use these values to avoid confusion with someone else that may be following this. For HPDD this is a shared account.
...
When all the fields are filled in, click on "Create VPC".

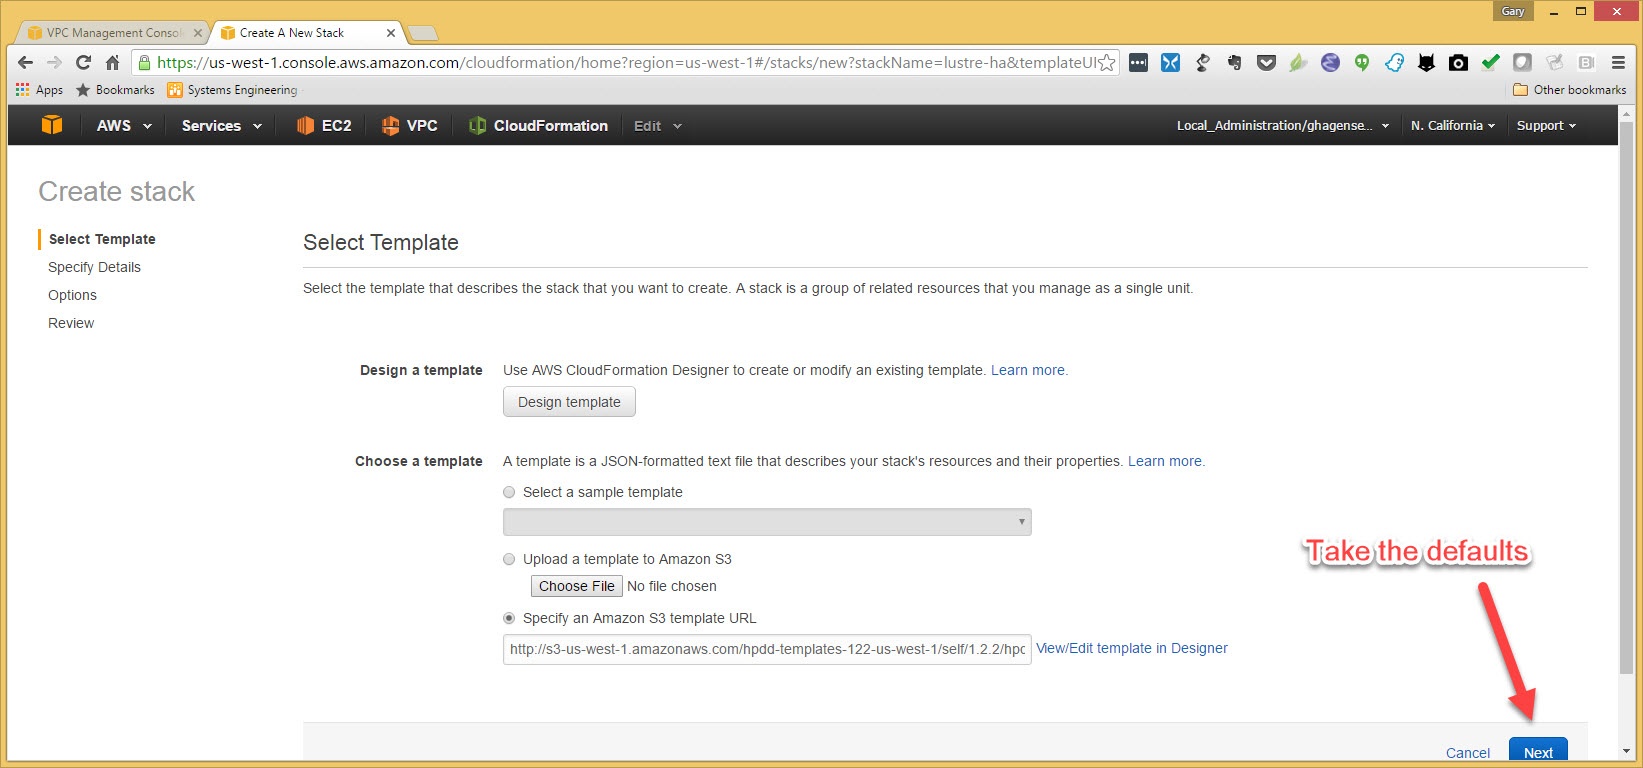
Now browse to "Cloud Edition for Lustre * - Self Support" and on this page are all the stacks that are available. For this example we are using the California AWS domain.

Just take the defaults on the next screen and click "Next"
On the next page give your stack a unique name. aws-demo-lustre-ha is used for this example.
...
Choose the key pair we made from the drop down list.

In the above screen there is other customization that you can make. If you want over-the-wire encryption (uses IPsec), then set the option "Enable Encryption" to "True".
...
In the screenshot below is the "WorkerCount" and "WorkerInstanceType" to specify the number of client nodes you would like created and the type of VM instance to use. You would not need these if you have your own clients configured separately that you want to connect to this filesystem.
To continue with this example in Choose the VPC we created in the "Vpcid" drop-down box.

Fill out the CIDR and choose the subnet we created when we created our VPC.

go to the next screen and click on "Next". No changes will be made on this screen.

check the box.. yes we know AWS is not free. And then click on "Create"

When the GUI transitions to the next page, you may need to refresh using the refresh symbol the upper right of the page.
...
You can return to this page any time by clicking on "Cloud Formation" that we put on the access bar.

To access the servers, you will need to ssh to the NAT node with a pagent active and forwarding enabled and then ssh from the NAT node to the servers.
...
If you would like to mount your new Lustre Filesystem to, see Cloud Edition for Lustre software - Client Setup for instructions on using the ce-configure command to setup your clients for Lustre access.
Overview
Content Tools