Page History
| Table of Contents | ||
|---|---|---|
|
How to
...
deploy an EXAScaler Cloud Application
| Anchor | ||||
|---|---|---|---|---|
|
EXAScaler Cloud application can be launched on Microsofts Azure platform Portal by navigating to the link below and selecting GET IT NOWand clicking the Create button.
Step by
...
step deployment video
| Widget Connector | ||
|---|---|---|
|
Step by step deployment guide
The steps below will show how to create a EXAScaler Cloud Cluster on Microsoft Azure platform.
...
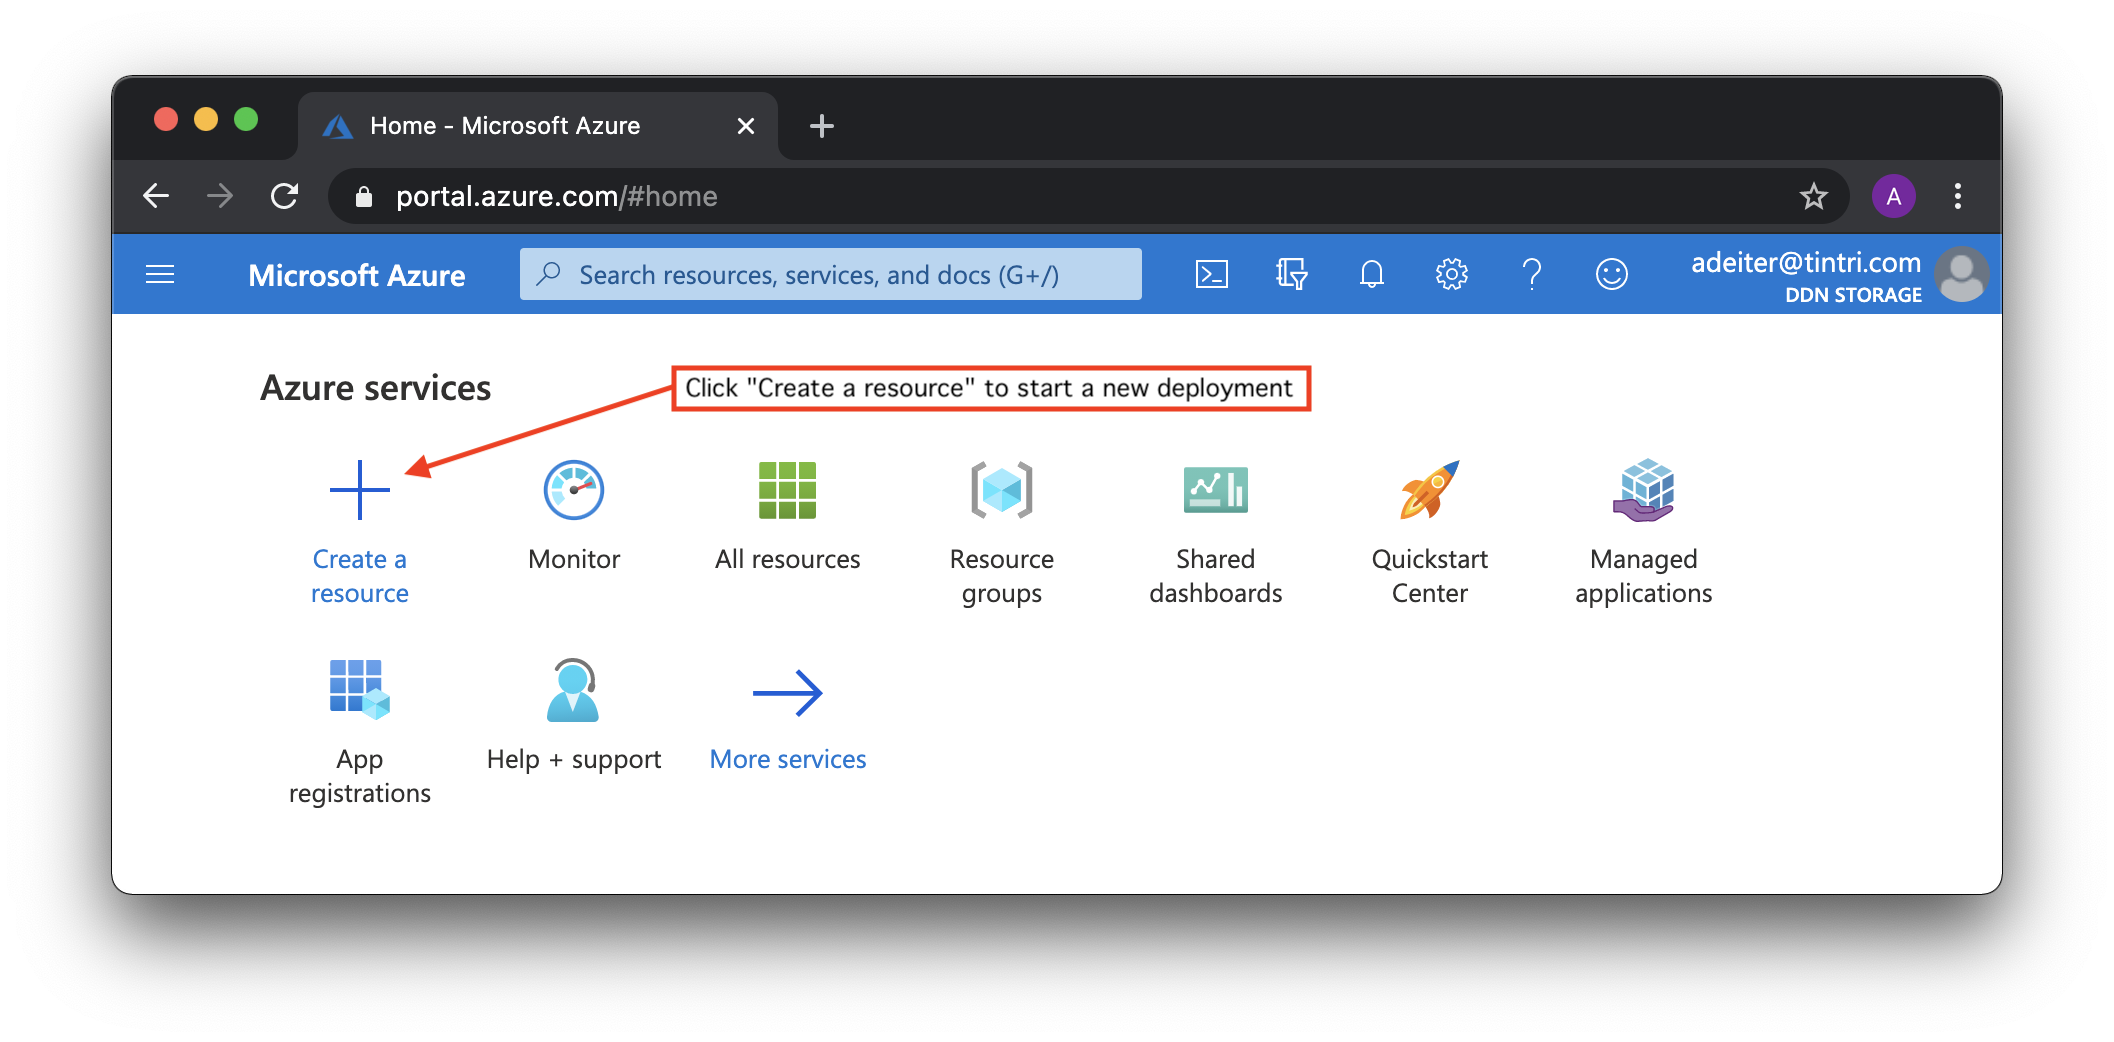
You can get to the dashboard from anywhere by clicking on the blue "Microsoft Azure" in the upper left corner of the GUI.
To get started click on "Create a resource" to get ready to start deployments of a new instance of EXAScaler of EXAScaler Cloud:.

In the search box that appears, type "EXAScaler Cloud" and hit return. For some reason the completions that start to show up do not work as expected:.


Click "Create" button:.


EXAScaler Cloud environment can be deployed as a standard Azure application using the Azure Marketplace. And the installation wizard is used to deploy it. Installation wizard contains few configuration steps:.
Basic ➊ Basics step
contains Project details: section
- Subscription - because all resources in an Azure subscription are billed together. And So we need select one from list of available subscriptions.
- Resource group - is a collection of resources that share the same lifecycle, permissions, and policies. And we can select an existing resource group or create a new one to deploy an EXAScaler Cloud environment.
and Instance details section:
- Azure region for our deployment. For example, we can select the location closest to us. And we must have enough resources in this location for the deployment (number of available CPU cores).
- Deployment type: Install to create a new deployment or Upgrade to update an existing deployment.

➋ Deployment step
Deployment details section
- Configuration Profile: we can choose predefined configuration profile or create a custom EXAScaler Cloud configuration. We provides two Two predefined profiles available:
- Small configuration profile that will configure Microsoft Azure resources to deliver 10TB capacity and 1.44 GB/s throughput performance.
- Medium configuration profile that will configure Microsoft Azure resources to deliver 50TB capacity and 6 GB/s throughput performance.
- And one Custom profile configuration profile, that allows us to deploy any environment according to our requirements.DDN

EXAScaler Cloud pricing is based on the number of CPU cores configured to meet the defined performance requirements. And DDN Premium Support is recommended for Custom configuration profile.
- OS image: we can choose Red Hat Enterprise Linux or CentOS Linux as a base OS to deploy.

- Filesystem name that Filesystem name that will be mounted from compute clients as a distributed network resource.


Security step required to select user name and authentication parameters to remote access to the management server. And Microsoft Azure provides two options for
authentication: password and SSH key-based authentication:

Network step to configure Azure Virtual Network which enables resources to securely communicate with each other. And the subnet inside the virtual network where EXAScaler Cloud virtual machines will be deployed to.
We can create a new virtual network for deployment or we can use an existing network, for example, if we already have an environment with clients that need a HPC storage:

Management step to configure EXAScaler Cloud management server. For the Custom Configuration profile we can choose:
- Size of management server
- Type and size of management target
- Type and size of monitoring target
For Small and Medium Configuration profiles all configuration options are read-only:

Metadata step to configure EXAScaler Cloud management server. For the Custom Configuration profile we can choose:
- Size of metadata server
- Type and size of metadata target
For Small and Medium Configuration profiles all configuration options are read-only:

Storage step to configure EXAScaler Cloud object storage servers. For the Custom Configuration profile we can choose:
- Size of storage server
- Number of storage servers
- Type, size and count of storage targets
For Small and Medium Configuration profiles all configuration options are read-only:

Client step: optionally we can deploy client instances and by default the size and number of client instances matches the size and number of object storage servers. As an option we can create and attach local disks to each EXAScaler Cloud client. We can change:
- Size of storage client
- Number of storage clients
- Type, size and count of storage targets
And all storage client options can be changed for any Configuration profile:

Review + create step: at this stage Microsoft Azure checks all selected options against the subscription quota. And we can review and check all the parameters we have chosen before starting the deployment:
- Subscription
- Resource group
- Region
- Configuration profile
- Filesystem name
- User name and authentication parameters
- Network properties
- Management server options
- Metadata server options
- Storage server(s) options
- Storage client(s) options
And we can press a "Create" button and send the selected configuration for deployment.
Next you will see the dashboard notification with "Deployment is in progress":

Once the status changes to "Your deployment is complete", click on "Outputs" to view the deployment output:

In the "Outputs" screen:

command to remote access
to mount EXAScaler distributed file system. All storage clients created in this deployment should mount this filesystem
- EXAScaler Cloud Private IP Addresses
To remote access the EXAScaler Cloud servers (management, metadata, object storage and storage clients), we must go through the management server public IP address, using the command.
And then using the management server console as a jump host we can open a SSH sessions to all other servers.
| Code Block | ||||
|---|---|---|---|---|
| ||||
localhost$ eval $(ssh-agent)
Agent pid 5095

localhost$ ssh-add
Identity added: /Users/deiter/.ssh/id_rsa (/Users/deiter/.ssh/id_rsa)

localhost$ ssh -A exacloud@137.135.11.112
[exacloud@exacloud-5606-mgs0 ~]$ ssh 10.1.0.9

[exacloud@exacloud-5606-oss3 ~]$ df -h -t lustre
Filesystem      Size  Used Avail Use% Mounted on
/dev/sdc        504G  1.3M  479G   1% /mnt/targets/exacloud-OST0012
/dev/sdd        504G  1.3M  479G   1% /mnt/targets/exacloud-OST0013
/dev/sde        504G  1.3M  479G   1% /mnt/targets/exacloud-OST0014
/dev/sdf        504G  1.3M  479G   1% /mnt/targets/exacloud-OST0015
/dev/sdg        504G  1.3M  479G   1% /mnt/targets/exacloud-OST0016
/dev/sdh        504G  1.3M  479G   1% /mnt/targets/exacloud-OST0017

[exacloud@exacloud-5606-oss3 ~]$ exit
logout
Connection to 10.1.0.9 closed.

[exacloud@exacloud-5606-mgs0 ~]$ ssh 10.1.0.7
[exacloud@exacloud-5606-cls0 ~]$ lfs df
UUID                   1K-blocks        Used   Available Use% Mounted on
exacloud-MDT0000_UUID   315302464        6204   288452716   1% /mnt/exacloud[MDT:0]
exacloud-OST0000_UUID   528246848        1256   501385664   1% /mnt/exacloud[OST:0]
exacloud-OST0001_UUID   528246848        1260   501385660   1% /mnt/exacloud[OST:1]
exacloud-OST0002_UUID   528246848        1260   501385660   1% /mnt/exacloud[OST:2]
exacloud-OST0003_UUID   528246848        1260   501385660   1% /mnt/exacloud[OST:3]
exacloud-OST0004_UUID   528246848        1260   501385660   1% /mnt/exacloud[OST:4]
exacloud-OST0005_UUID   528246848        1264   501385656   1% /mnt/exacloud[OST:5]
exacloud-OST0006_UUID   528246848        1240   501385680   1% /mnt/exacloud[OST:6]
exacloud-OST0007_UUID   528246848        1244   501385676   1% /mnt/exacloud[OST:7]
exacloud-OST0008_UUID   528246848        1244   501385676   1% /mnt/exacloud[OST:8]
exacloud-OST0009_UUID   528246848        1248   501385672   1% /mnt/exacloud[OST:9]
exacloud-OST000a_UUID   528246848        1252   501385668   1% /mnt/exacloud[OST:10]
exacloud-OST000b_UUID   528246848        1252   501385668   1% /mnt/exacloud[OST:11]
exacloud-OST000c_UUID   528246848        1244   501385676   1% /mnt/exacloud[OST:12]
exacloud-OST000d_UUID   528246848        1248   501385672   1% /mnt/exacloud[OST:13]
exacloud-OST000e_UUID   528246848        1248   501385672   1% /mnt/exacloud[OST:14]
exacloud-OST000f_UUID   528246848        1252   501385668   1% /mnt/exacloud[OST:15]
exacloud-OST0010_UUID   528246848        1256   501385664   1% /mnt/exacloud[OST:16]
exacloud-OST0011_UUID   528246848        1260   501385660   1% /mnt/exacloud[OST:17]
exacloud-OST0012_UUID   528246848        1244   501385676   1% /mnt/exacloud[OST:18]
exacloud-OST0013_UUID   528246848        1248   501385672   1% /mnt/exacloud[OST:19]
exacloud-OST0014_UUID   528246848        1248   501385672   1% /mnt/exacloud[OST:20]
exacloud-OST0015_UUID   528246848        1252   501385668   1% /mnt/exacloud[OST:21]
exacloud-OST0016_UUID   528246848        1256   501385664   1% /mnt/exacloud[OST:22]
exacloud-OST0017_UUID   528246848        1256   501385664   1% /mnt/exacloud[OST:23]

filesystem_summary:  12677924352       30052 12033256028   1% /mnt/exacloud
|
Copy and paste the "" URL on a new browser tab to view EXAScaler Cloud Web Console:


Availability options section
Azure offers a range of options for managing availability and resiliency. And we can choose:

- None - no infrastructure redundancy required.
- Availability set - logical grouping of virtual machines that allows Azure to provide redundancy and availability. Each virtual machine in an availability set is assigned an update domain and a fault domain by the underlying Azure platform. Fault domains define the group of virtual machines that share a common power source and network switch. And the virtual machines configured within an availability set are separated across 3 fault domains. Update domains indicate groups of virtual machines and underlying physical hardware that can be rebooted at the same time.
- Availability zone - unique physical locations within an Azure region. Each zone is made up of one or more datacenters with independent power, cooling, and networking. To ensure resiliency, there is a minimum of three separate zones in all enabled regions. The physical separation of availability zones within a region protects applications and data from datacenter failures. An availability zone in an Azure region is a combination of a fault domain and an update domain.

➌ Security step
allows you to choose user name and authentication parameters to remote access to the management server. And Microsoft Azure provides two options for
authentication.
Password based authentication

and SSH public key-based authentication

➍ Network step
To configure Azure Virtual Network which enables resources to securely communicate with each other. And the subnet inside the virtual network where EXAScaler Cloud environment will be deployed to.

We can use an existing network or create a new virtual network and specify address range

Also we can assign external IP addresses:
- Management server - public IP address will be assigned to the management server only
- All servers - public IP addresses will be assigned to all servers
- None - no public IP addresses sill be assigned

And configure remote access for SSH and HTTP protocols

➎ Management step
To configure EXAScaler Cloud management server.

For the Custom configuration profile we can configure:
- Type of management server

- Type and size of management target
- Type and size of monitoring target

And all selected configurations are checked for compliance

For predefined Small and Medium configuration profiles all configuration options are read-only.
➏ Metadata step
To configure EXAScaler Cloud management server. For the Custom configuration profile we can change:
- Type of metadata server
- Type and size of metadata target

For predefined Small and Medium configuration profiles all configuration options are read-only.
➐ Storage step
To configure EXAScaler Cloud storage servers. For the Custom configuration profile we can change:
- Type of storage server
- Number of storage servers
- Type, size and count of storage targets

For predefined Small and Medium configuration profiles all configuration options are read-only.
➑ Client step
Optionally we can deploy compute client instances and by default the size and number of compute client instances matches the size and number of object storage servers. As an option we can create and attach local disks to each EXAScaler Cloud compute client. We can change:
- Size of storage client
- Number of storage clients
- Type, size and count of storage targets

And all compute client options can be changed for any type of the configuration profile.
➒ Review + create step
At this stage Microsoft Azure checks all selected options against the subscription quota. And we can review and check all the parameters we have chosen before starting the deployment:
- Subscription
- Resource group
- Region
- Deployment type
- Configuration profile
- OS image
- Filesystem name
- Availability type
- Availability zone
- User name and authentication parameters
- Virtual network and subnet parameters
- Public IP address options
- Remote access parameters
- Management server options
- Metadata server options
- Storage server(s) options
- Compute client(s) options
And we can press a "Create" button and send the selected configuration for deployment.
Next we will see the dashboard notification with "Deployment is in progress":
Once the status changes to "Your deployment is complete", click on "Outputs" to view the deployment output:

In the "Outputs" screen:

- Dashboard URL to display the deployment details
command to remote access to the management server
to mount EXAScaler Cloud distributed file system. All compute clients created in this deployment should mount this filesystem
- Private IP addresses
Copy and paste the "" URL on a new browser tab to display detailed deployment statistics:


Some additional information is available on the Azure shared dashboard: Azure portal → Home → Resource groups → EXAScaler-Cloud:

Click the dashboard name and open the "Go to dashboard" link:


And you can customize the dashboard according to your requirements.
How to automate deployment with Terraform
Automated deployment is possible with EXAScaler Cloud Terraform Scripts.
The steps below will show how to create a EXAScaler Cloud environment on Microsoft Azure using Terraform.
Supported products
| Product | Version | Base OS | Stock Keeping Unit (SKU) |
|---|---|---|---|
| EXAScaler Cloud | 5.2.6 | Red Hat Enterprise Linux 7.9 | exascaler_cloud_5_2_redhat |
| EXAScaler Cloud | 5.2.6 | CentOS Linux 7.9 | exascaler_cloud_5_2_centos |
| EXAScaler Cloud | 6.0.1 | Red Hat Enterprise Linux 7.9 | exascaler_cloud_6_0_redhat |
| EXAScaler Cloud | 6.0.1 | CentOS Linux 7.9 | exascaler_cloud_6_0_centos |
| EXAScaler Cloud | 6.1.0 | Red Hat Enterprise Linux 7.9 | exascaler_cloud_6_1_redhat |
| EXAScaler Cloud | 6.1.0 | CentOS Linux 7.9 | exascaler_cloud_6_1_centos |
| EXAScaler Cloud | 6.2.0 | Red Hat Enterprise Linux 8.7 | exascaler_cloud_6_2_redhat |
| EXAScaler Cloud | 6.2.0 | Rocky Linux 8.7 | exascaler_cloud_6_2_rocky |
| EXAScaler Cloud | 6.3.2 | Red Hat Enterprise Linux 8.10 | exascaler_cloud_6_3_redhat |
| EXAScaler Cloud | 6.3.2 | Rocky Linux 8.10 | exascaler_cloud_6_3_rocky |
Client packages
EXAScaler Cloud deployment provides support for installing and configuring third-party clients. EXAScaler Cloud client software comprises a set of kernel modules which must be compatible with the running kernel, as well as userspace tools for interacting with the filesystem.
| Vendor | Product | Version | Arch | Kernel Version for binary package | Kernel Version for DKMS package |
|---|---|---|---|---|---|
| Red Hat | RHEL | 7.6 | x86_64 | 3.10.0-957.99.1.el7.x86_64 | 3.10.0 |
| Red Hat | RHEL | 7.7 | x86_64 | 3.10.0-1062.77.1.el7.x86_64 | 3.10.0 |
| Red Hat | RHEL | 7.8 | x86_64 | 3.10.0-1127.19.1.el7.x86_64 | 3.10.0 |
| Red Hat | RHEL | 7.9 | x86_64 | 3.10.0-1160.119.1.el7.x86_64 | 3.10.0 |
| Red Hat | RHEL | 8.0 | x86_64 | 4.18.0-80.31.1.el8_0.x86_64 | 4.18.0 |
| Red Hat | RHEL | 8.1 | x86_64 | 4.18.0-147.94.1.el8_1.x86_64 | 4.18.0 |
| Red Hat | RHEL | 8.2 | x86_64 | 4.18.0-193.141.1.el8_2.x86_64 | 4.18.0 |
| Red Hat | RHEL | 8.3 | x86_64 | 4.18.0-240.22.1.el8_3.x86_64 | 4.18.0 |
| Red Hat | RHEL | 8.4 | x86_64 | 4.18.0-305.148.1.el8_4.x86_64 | 4.18.0 |
| Red Hat | RHEL | 8.5 | x86_64 | 4.18.0-348.23.1.el8_5.x86_64 | 4.18.0 |
| Red Hat | RHEL | 8.6 | aarch64 | 4.18.0-372.105.1.el8_6.aarch64 | 4.18.0 |
| Red Hat | RHEL | 8.6 | x86_64 | 4.18.0-372.134.1.el8_6.x86_64 | 4.18.0 |
| Red Hat | RHEL | 8.7 | aarch64 | 4.18.0-425.19.2.el8_7.aarch64 | 4.18.0 |
| Red Hat | RHEL | 8.7 | x86_64 | 4.18.0-425.19.2.el8_7.x86_64 | 4.18.0 |
| Red Hat | RHEL | 8.8 | aarch64 | 4.18.0-477.86.1.el8_8.aarch64 | 4.18.0 |
| Red Hat | RHEL | 8.8 | x86_64 | 4.18.0-477.86.1.el8_8.x86_64 | 4.18.0 |
| Red Hat | RHEL | 8.9 | aarch64 | 4.18.0-513.24.1.el8_9.aarch64 | 4.18.0 |
| Red Hat | RHEL | 8.9 | x86_64 | 4.18.0-513.24.1.el8_9.x86_64 | 4.18.0 |
| Red Hat | RHEL | 8.10 | aarch64 | 4.18.0-553.40.1.el8_10.aarch64 | 4.18.0 |
| Red Hat | RHEL | 8.10 | x86_64 | 4.18.0-553.40.1.el8_10.x86_64 | 4.18.0 |
| Red Hat | RHEL | 9.0 | aarch64 | 5.14.0-70.101.1.el9_0.aarch64 | 5.14.0 |
| Red Hat | RHEL | 9.0 | x86_64 | 5.14.0-70.122.1.el9_0.x86_64 | 5.14.0 |
| Red Hat | RHEL | 9.1 | aarch64 | 5.14.0-162.23.1.el9_1.aarch64 | 5.14.0 |
| Red Hat | RHEL | 9.1 | x86_64 | 5.14.0-162.23.1.el9_1.x86_64 | 5.14.0 |
| Red Hat | RHEL | 9.2 | aarch64 | 5.14.0-284.99.1.el9_2.aarch64 | 5.14.0 |
| Red Hat | RHEL | 9.2 | x86_64 | 5.14.0-284.99.1.el9_2.x86_64 | 5.14.0 |
| Red Hat | RHEL | 9.3 | aarch64 | 5.14.0-362.24.1.el9_3.aarch64 | 5.14.0 |
| Red Hat | RHEL | 9.3 | x86_64 | 5.14.0-362.24.1.el9_3.x86_64 | 5.14.0 |
| Red Hat | RHEL | 9.4 | aarch64 | 5.14.0-427.50.1.el9_4.aarch64 | 5.14.0 |
| Red Hat | RHEL | 9.4 | x86_64 | 5.14.0-427.50.1.el9_4.x86_64 | 5.14.0 |
| Red Hat | RHEL | 9.5 | aarch64 | 5.14.0-503.26.1.el9_5.aarch64 | 5.14.0 |
| Red Hat | RHEL | 9.5 | x86_64 | 5.14.0-503.26.1.el9_5.x86_64 | 5.14.0 |
| Canonical | Ubuntu | 16.04 LTS | amd64 | — | 4.4 - 4.15 |
| Canonical | Ubuntu | 18.04 LTS | amd64 | — | 4.15 - 5.4 |
| Canonical | Ubuntu | 20.04 LTS | amd64 | — | 5.4 - 5.15 |
| Canonical | Ubuntu | 20.04 LTS | arm64 | — | 5.4 - 5.15 |
| Canonical | Ubuntu | 22.04 LTS | amd64 | — | 5.15 - 6.2 |
| Canonical | Ubuntu | 22.04 LTS | arm64 | — | 5.15 - 6.2 |
| Canonical | Ubuntu | 24.04 LTS | amd64 | — | 6.8 - TBD |
| Canonical | Ubuntu | 24.04 LTS | arm64 | — | 6.8 - TBD |
Notes:
- Client packages for
aarch64andarm64architectures are available only for EXAScaler Cloud 6.3 - Client packages for Canonical Ubuntu
16.04 LTSare not available for EXAScaler Cloud 6.3
Prerequisites
- You need a Microsoft account
- Your system needs the Microsoft Azure CLI as well as Terraform
Before deploy Terraform code for Microsoft Azure, you will need to authenticate under the Microsoft account you used to log into the Microsoft Azure Portal. You will use a Microsoft account and its credentials to allow Terraform to deploy resources.
DDN EXAScaler Cloud in the Azure Marketplace have additional license and purchase terms that you must accept before you can deploy them programmatically. To deploy an environment from this image, you'll need to accept the image's terms the first time you use it, once per subscription.
Steps to authenticate via Microsoft account
Obtains access credentials for your user account via a web-based authorization flow. When this command completes successfully, it sets the active account in the current configuration to the account specified. Learn more about Azure authentication.
| Code Block | ||||
|---|---|---|---|---|
| ||||
$ az login
[
  {
    "cloudName": "AzureCloud",
    "homeTenantId": "00000000-0000-0000-0000-000000000000",
    "id": "00000000-0000-0000-0000-000000000000",
    "isDefault": true,
    "managedByTenants": [],
    "name": "Subscription-Name",
    "state": "Enabled",
    "tenantId": "00000000-0000-0000-0000-000000000000",
    "user": {
      "name": "user@domain.com",
      "type": "user"
    }
  }
] |
To view the current Azure subscription ID, please use az account show.
| Code Block | ||||
|---|---|---|---|---|
| ||||
$ az account show
{
  "environmentName": "AzureCloud",
  "homeTenantId": "00000000-0000-0000-0000-000000000000",
  "id": "00000000-0000-0000-0000-000000000000",
  "isDefault": true,
  "managedByTenants": [],
  "name": "Subscription-Name",
  "state": "Enabled",
  "tenantId": "00000000-0000-0000-0000-000000000000",
  "user": {
    "name": "user@domain.com",
    "type": "user"
  }
} |
Please use the value of id property as an Azure subscription ID for Terraform based deployments.
Steps to accept the terms of use for DDN EXAScaler Cloud images
To deploy DDN EXAScaler Cloud, you need to accept the Azure Marketplace image terms so that the image can be used to create a deployment.
For EXAScaler Cloud 5.2 and CentOS Linux based image:
Code Block language bash theme Midnight $ az vm image terms accept --urn ddn-whamcloud-5345716:exascaler_cloud:exascaler_cloud_5_2_centos:latestFor EXAScaler Cloud 5.2 and Red Hat Enterprise Linux based image:
Code Block language bash theme Midnight $ az vm image terms accept --urn ddn-whamcloud-5345716:exascaler_cloud:exascaler_cloud_5_2_redhat:latestFor EXAScaler Cloud 6.0 and CentOS Linux based image:
Code Block language bash theme Midnight $ az vm image terms accept --urn ddn-whamcloud-5345716:exascaler_cloud:exascaler_cloud_6_0_centos:latestFor EXAScaler Cloud 6.0 and Red Hat Enterprise Linux based image:
Code Block language bash theme Midnight $ az vm image terms accept --urn ddn-whamcloud-5345716:exascaler_cloud:exascaler_cloud_6_0_redhat:latestFor EXAScaler Cloud 6.1 and CentOS Linux based image:
Code Block language bash theme Midnight $ az vm image terms accept --urn ddn-whamcloud-5345716:exascaler_cloud:exascaler_cloud_6_1_centos:latestFor EXAScaler Cloud 6.1 and Red Hat Enterprise Linux based image:
Code Block language bash theme Midnight $ az vm image terms accept --urn ddn-whamcloud-5345716:exascaler_cloud:exascaler_cloud_6_1_redhat:latest
Learn more about the image terms.
Steps to configure Terraform
Download Terraform scripts and extract the tarball:
| Code Block | ||||
|---|---|---|---|---|
| ||||
$ curl -sL https://github.com/DDNStorage/exascaler-cloud-terraform/archive/refs/tags/scripts/2.2.2.tar.gz | tar xz |
Change Terraform variables according you requirements:
| Code Block | ||||
|---|---|---|---|---|
| ||||
$ cd exascaler-cloud-terraform-scripts-2.2.2/az
$ vi terraform.tfvars |
List of available variables
Common options
| Variable | Type | Default | Description |
|---|---|---|---|
prefix | string | null | EXAScaler Cloud custom deployment prefix. Set this option to add a custom prefix to all created objects. |
tags | map | {} | EXAScaler Cloud custom deployment tags. Set this option to add a custom tags to all created objects. Learn more about Azure tags. |
fsname | string | exacloud | EXAScaler filesystem name. Learn more about Lustre filesystem. |
subscription | string | 00000000-0000-0000-0000-000000000000 | Subscription ID - please use ID of you active Azure subscription. Learn more Azure subscriptions. |
location | string | West US | Azure region to manage resources. Learn more about Azure geography. |
Availability options
| Variable | Type | Default | Description |
|---|---|---|---|
availability.type | string | none | Availability type: none - no infrastructure redundancy required, set - to create an availability set and automatically distribute resources across multiple fault domains, zone - to physically separate resources within an Azure region. Learn more about Azure availability options. |
availability.zone | integer | 1 | Availability zone - unique physical locations within a Azure region. Use 1, 2 or 3 to explicitly specify the availability zone. Learn more about Azure availability zones. |
Resource group options
| Variable | Type | Default | Description |
|---|---|---|---|
resource_group.new | bool | true | Create a new resource group, or use an existing one: true or false. |
resource_group.name | string | existing-resource-group | Existing resource group name, will be using if new is false. |
Learn more about Azure resource groups.
Proximity placement group options
| Variable | Type | Default | Description |
|---|---|---|---|
proximity_placement_group.new | bool | true | Create a new proximity placement group, or use an existing one: true or false. |
proximity_placement_group.name | string | existing-proximity-placement-group | Existing proximity placement group name, will be using if new is false. |
Learn more about Azure proximity placement groups.
Network options
| Variable | Type | Default | Description |
|---|---|---|---|
network.new | bool | true | Create a new network, or use an existing one: true or false. |
network.name | string | existing-network | Existing network name, will be using only if new option is false. |
network.address | string | 10.0.0.0/8 | IP address in CIDR notation for the new virtual network. |
Learn more about Azure virtual networks.
Subnet options
| Variable | Type | Default | Description |
|---|---|---|---|
subnet.new | bool | true | Create a new subnet, or use an existing one: true or false. |
subnet.name | string | existing-subnet | Existing subnet name, will be using only if new option is false. |
network.address | string | 10.0.0.0/24 | IP address in CIDR notation for the new subnet. |
Learn more about Azure virtual networks and subnets.
Security options
| Variable | Type | Default | Description |
|---|---|---|---|
security.username | string | stack | User name for remote SSH access. Learn more about Azure SSH options. |
security.ssh_public_key | string | ~/.ssh/id_rsa.pub | Path to the local SSH public key. This file will be added to admin home directory as .ssh/authorized_keys. Learn more about Azure SSH options. |
security.enable_ssh | bool | true | true or false: enable or disable remote SSH access. |
security.enable_http | bool | true | true or false, enable or disable remote HTTP access. |
security.ssh_source_ranges | list(string) | [0.0.0.0/0] | Source IP ranges for remote SSH access in CIDR notation. Learn more about Azure network security groups. |
security.http_source_ranges | list(string) | [0.0.0.0/0] | Source IP ranges for remote HTTP access in CIDR notation. Learn more Azure network security groups. |
Boot disk options
| Variable | Type | Default | Description |
|---|---|---|---|
boot.disk_type | string | StandardSSD_LRS | Specifies the type of managed disk to create:
|
boot.disk_cache | string | ReadWrite | Specifies the caching requirements for the target disk:
|
boot.auto_delete | bool | true | Delete the boot disk automatically when deleting the virtual machine: trueor false. |
boot.disk_size | integer | 64 | Boot disk size in GB. |
Learn more about Azure disks types.
Source image options
| Variable | Type | Default | Description |
|---|---|---|---|
image.publisher | string | ddn-whamcloud-5345716 | Specifies the publisher of the image used to create the virtual machine. |
image.offer | string | exascaler_cloud | Specifies the offer of the image used to create the virtual machine. |
image.sku | string | exascaler_cloud_6_3_rocky | Specifies the EXAScaler Cloud 5.2 images:
EXAScaler Cloud 6.1 images:
EXAScaler Cloud 6.2 images:
EXAScaler Cloud 6.3 images:
|
image.version | string | latest | Specifies the version of the image used to create the virtual machine. |
image.accept | bool | false | Allows automatically accepting the legal terms for a Marketplace image. |
Learn more about Azure disk images.
Storage account options
| Variable | Type | Default | Description |
|---|---|---|---|
storage_account.kind | string | StorageV2 | Defines the kind of account. Valid options are:
|
storage_account.tier | string | Standard | Defines the tier to use for this storage account. Valid options are:
|
storage_account.replication | string | LRS | Defines the type of replication to use for this storage account. Valid options are:
|
Learn more about Azure storage accounts.
Management server options
| Variable | Type | Default | Description |
|---|---|---|---|
mgs.node_type | string | Standard_F4s | Type of management server. Learn more about Azure performance considerations. |
mgs.node_count | integer | 1 | Number of management servers: 1. |
mgs.public_ip | bool | true | Assign a public IP address: true or false. Learn more about Azure public IP addresses. |
mgs.accelerated_network | bool | false | Enable accelerated networking. Learn more about Azure accelerated networking. |
Management target options
| Variable | Type | Default | Description |
|---|---|---|---|
mgt.disk_type | string | StandardSSD_LRS | Specifies the type of managed disk to create the management target:
|
mgt.disk_cache | string | None | Specifies the caching requirements for the management target:
|
mgt.disk_size | integer | 256 | Specifies the size of the management target in GB. |
mgt.disk_count | integer | 1 | Specifies the number of management targets: 1-128. |
mgt.disk_raid | bool | false | Create striped management target: true or false. |
Learn more about Azure disks types
Monitoring target options
| Variable | Type | Default | Description |
|---|---|---|---|
mnt.disk_type | string | StandardSSD_LRS | Specifies the type of managed disk to create the monitoring target:
|
mnt.disk_cache | string | None | Specifies the caching requirements for the monitoring target:
|
mnt.disk_size | integer | 128 | Specifies the size of the monitoring target in GB. |
mnt.disk_count | integer | 1 | Specifies the number of monitoring targets: 1-128. |
mnt.disk_raid | bool | false | Create striped monitoring target: true or false. |
Learn more about Azure disks types
Metadata server options
| Variable | Type | Default | Description |
|---|---|---|---|
mds.node_type | string | Standard_E8s_v3 | Type of metadata server. Learn more about Azure performance considerations. |
mds.node_count | integer | 1 | Number of metadata servers: 1-32. |
mds.public_ip | bool | false | Assign a public IP address: true or false. Learn more about Azure public IP addresses. |
mds.accelerated_network | bool | false | Enable accelerated networking. Learn more about Azure accelerated networking. |
Metadata target options
| Variable | Type | Default | Description |
|---|---|---|---|
mdt.disk_type | string | Premium_LRS | Specifies the type of managed disk to create the metadata target:
|
mdt.disk_cache | string | None | Specifies the caching requirements for the metadata target:
|
mdt.disk_size | integer | 512 | Specifies the size of the metadata target in GB. |
mdt.disk_count | integer | 1 | Specifies the number of metadata targets: 1-128. |
mdt.disk_raid | bool | false | Create striped metadata target: true or false. |
Learn more about Azure disks types
Object Storage server options
| Variable | Type | Default | Description |
|---|---|---|---|
oss.node_type | string | Standard_Ds16_v3 | Type of object storage server. Learn more about Azure performance considerations. |
oss.node_count | integer | 4 | Number of object storage servers: 1-2000. |
oss.public_ip | bool | false | Assign a public IP address: true or false. Learn more about Azure public IP addresses. |
oss.accelerated_network | bool | false | Enable accelerated networking. Learn more about Azure accelerated networking. |
Object Storage target options
| Variable | Type | Default | Description |
|---|---|---|---|
ost.disk_type | string | Standard_LRS | Specifies the type of managed disk to create the object storage target:
|
ost.disk_cache | string | None | Specifies the caching requirements for the object storage target:
|
ost.disk_size | integer | 512 | Specifies the size of the object storage target in GB. |
ost.disk_count | integer | 6 | Specifies the number of object storage targets: 1-128. |
ost.disk_raid | bool | false | Create striped object storage target: true or false. |
Learn more about Azure disks types
Compute client options
| Variable | Type | Default | Description |
|---|---|---|---|
cls.node_type | string | Standard_Ds16_v3 | Type of compute client. Learn more about Azure performance considerations. |
cls.node_count | integer | 4 | Number of compute clients. |
cls.public_ip | bool | false | Assign a public IP address: true or false. Learn more about Azure public IP addresses. |
cls.accelerated_network | bool | false | Enable accelerated networking. Learn more about Azure accelerated networking. |
Compute client target options
| Variable | Type | Default | Description |
|---|---|---|---|
clt.disk_type | string | Standard_LRS | Specifies the type of managed disk to create the compute target:
|
clt.disk_cache | string | None | Specifies the caching requirements for the compute target:
|
clt.disk_size | integer | 32 | Specifies the size of the compute target in GB. |
clt.disk_count | integer | 0 | Specifies the number of compute targets. |
Learn more about Azure disks types
Deploy an EXAScaler Cloud environment
Initialize a working directory containing Terraform configuration files. This is the first command that should be run after writing a new Terraform configuration or cloning an existing one from version control. It is safe to run this command multiple times:
| Code Block | ||||
|---|---|---|---|---|
| ||||
$ terraform init

Initializing the backend...

Initializing provider plugins...
- Finding hashicorp/azurerm versions matching ">= 3.10.0"...
- Finding latest version of hashicorp/random...
- Finding latest version of hashicorp/template...
- Installing hashicorp/azurerm v3.13.0...
- Installed hashicorp/azurerm v3.13.0 (signed by HashiCorp)
- Installing hashicorp/random v3.3.2...
- Installed hashicorp/random v3.3.2 (signed by HashiCorp)
- Installing hashicorp/template v2.2.0...
- Installed hashicorp/template v2.2.0 (signed by HashiCorp)

Terraform has created a lock file .terraform.lock.hcl to record the provider
selections it made above. Include this file in your version control repository
so that Terraform can guarantee to make the same selections by default when
you run "terraform init" in the future.

Terraform has been successfully initialized! |
You may now begin working with Terraform. Try running "terraform plan" to see any changes that are required for your infrastructure. All Terraform commands should now work. If you ever set or change modules or backend configuration for Terraform, rerun this command to reinitialize your working directory. If you forget, other commands will detect it and remind you to do so if necessary.
Validate configuration options:
| Code Block | ||||
|---|---|---|---|---|
| ||||
$ terraform validate

Success! The configuration is valid. |
Create an execution plan with a preview of the changes that Terraform will make to the environment:
| Code Block | ||||
|---|---|---|---|---|
| ||||
$ terraform plan |
Apply the changes required to reach the desired state of the configuration:
| Code Block | ||||
|---|---|---|---|---|
| ||||
$ terraform apply
...
  Enter a value: yes
...
Apply complete! Resources: 103 added, 0 changed, 0 destroyed.

Outputs:

azure_dashboard = "https://portal.azure.com/#@00000000-0000-0000-0000-000000000000/dashboard/arm/subscriptions/00000000-0000-0000-0000-000000000000/resourceGroups/exascaler-cloud-a108-resource-group/providers/Microsoft.Portal/dashboards/exascaler-cloud-a108-dashboard"

client_config = <<EOT
#!/bin/sh
# install new EXAScaler Cloud clients:
# all instances must be in the same location westus
# and connected to the network exascaler-cloud-a108-virtual-network
# and subnet exascaler-cloud-a108-subnet
# to set up EXAScaler Cloud filesystem on a new client instance,
# run the folowing commands on the client with root privileges:

cat >/etc/esc-client.conf<<EOF
{
  "Version": "2.0.0",
  "MountConfig": {
    "ClientDevice": "10.0.0.10@tcp:/exacloud",
    "Mountpoint": "/mnt/exacloud",
    "PackageSource": "http://10.0.0.10/client-packages"
  }
}
EOF

curl -fsSL http://10.0.0.10/client-setup-tool -o /usr/sbin/esc-client
chmod +x /usr/sbin/esc-client
esc-client auto setup --config /etc/esc-client.conf

EOT

http_console = "http://exascaler-cloud-a108-mgs0.westus.cloudapp.azure.com"

mount_command = "mount -t lustre 10.0.0.10@tcp:/exacloud /mnt/exacloud"

private_addresses = {
  "exascaler-cloud-a108-cls0" = "10.0.0.8"
  "exascaler-cloud-a108-cls1" = "10.0.0.7"
  "exascaler-cloud-a108-cls2" = "10.0.0.11"
  "exascaler-cloud-a108-cls3" = "10.0.0.12"
  "exascaler-cloud-a108-mds0" = "10.0.0.13"
  "exascaler-cloud-a108-mgs0" = "10.0.0.10"
  "exascaler-cloud-a108-oss0" = "10.0.0.9"
  "exascaler-cloud-a108-oss1" = "10.0.0.4"
  "exascaler-cloud-a108-oss2" = "10.0.0.5"
  "exascaler-cloud-a108-oss3" = "10.0.0.6"
}

ssh_console = {
  "exascaler-cloud-a108-mgs0" = "ssh -A stack@exascaler-cloud-a108-mgs0.westus.cloud
app.azure.com"
} |
Access the EXAScaler Cloud environment
Now you can access the EXAScaler Cloud environment:
| Code Block | ||||
|---|---|---|---|---|
| ||||
$ eval $(ssh-agent)
Agent pid 12313

$ ssh-add
Identity added: /Users/name/.ssh/id_rsa (/Users/name/.ssh/id_rsa)

$ ssh -A stack@exascaler-cloud-a108-mgs0.westus.cloudapp.azure.com

[stack@exascaler-cloud-a108-mgs0 ~]$ df -h -t lustre
Filesystem      Size  Used Avail Use% Mounted on
/dev/sdc        249G  2.4M  247G   1% /mnt/targets/MGS

[stack@exascaler-cloud-a108-mgs0 ~]$ loci hosts
10.0.0.8	exascaler-cloud-a108-cls0
10.0.0.7	exascaler-cloud-a108-cls1
10.0.0.11	exascaler-cloud-a108-cls2
10.0.0.12	exascaler-cloud-a108-cls3
10.0.0.13	exascaler-cloud-a108-mds0
10.0.0.10	exascaler-cloud-a108-mgs0
10.0.0.9	exascaler-cloud-a108-oss0
10.0.0.4	exascaler-cloud-a108-oss1
10.0.0.5	exascaler-cloud-a108-oss2
10.0.0.6	exascaler-cloud-a108-oss3

[stack@exascaler-cloud-a108-mgs0 ~]$ ssh exascaler-cloud-a108-cls0

[stack@exascaler-cloud-a108-cls0 ~]$ lfs df
UUID                   1K-blocks        Used   Available Use% Mounted on
exacloud-MDT0000_UUID   315302464        6212   309927544   1% /mnt/exacloud[MDT:0]
exacloud-OST0000_UUID   529449792        1256   524063444   1% /mnt/exacloud[OST:0]
exacloud-OST0001_UUID   529449792        1272   524063428   1% /mnt/exacloud[OST:1]
exacloud-OST0002_UUID   529449792        1268   524063432   1% /mnt/exacloud[OST:2]
exacloud-OST0003_UUID   529449792        1264   524063436   1% /mnt/exacloud[OST:3]
exacloud-OST0004_UUID   529449792        1256   524063444   1% /mnt/exacloud[OST:4]
exacloud-OST0005_UUID   529449792        1264   524063436   1% /mnt/exacloud[OST:5]
exacloud-OST0006_UUID   529449792        1276   524063424   1% /mnt/exacloud[OST:6]
exacloud-OST0007_UUID   529449792        1268   524063432   1% /mnt/exacloud[OST:7]
exacloud-OST0008_UUID   529449792        1260   524063440   1% /mnt/exacloud[OST:8]
exacloud-OST0009_UUID   529449792        1272   524063428   1% /mnt/exacloud[OST:9]
exacloud-OST000a_UUID   529449792        1268   524063432   1% /mnt/exacloud[OST:10]
exacloud-OST000b_UUID   529449792        1272   524063428   1% /mnt/exacloud[OST:11]
exacloud-OST000c_UUID   529449792        1256   524063444   1% /mnt/exacloud[OST:12]
exacloud-OST000d_UUID   529449792        1264   524063436   1% /mnt/exacloud[OST:13]
exacloud-OST000e_UUID   529449792        1268   524063432   1% /mnt/exacloud[OST:14]
exacloud-OST000f_UUID   529449792        1260   524063440   1% /mnt/exacloud[OST:15]
exacloud-OST0010_UUID   529449792        1272   524063428   1% /mnt/exacloud[OST:16]
exacloud-OST0011_UUID   529449792        1260   524063440   1% /mnt/exacloud[OST:17]
exacloud-OST0012_UUID   529449792        1256   524063444   1% /mnt/exacloud[OST:18]
exacloud-OST0013_UUID   529449792        1264   524063436   1% /mnt/exacloud[OST:19]
exacloud-OST0014_UUID   529449792        1256   524063444   1% /mnt/exacloud[OST:20]
exacloud-OST0015_UUID   529449792        1260   524063440   1% /mnt/exacloud[OST:21]
exacloud-OST0016_UUID   529449792        1272   524063428   1% /mnt/exacloud[OST:22]
exacloud-OST0017_UUID   529449792        1264   524063436   1% /mnt/exacloud[OST:23]

filesystem_summary: 12706795008 30348 12577522452 1% /mnt/exacloud |
Add storage capacity in an existing EXAScaler Cloud environment
The storage capacity can be added by increasing the number of storage servers. To add storage capacity in an existing EXAScaler Cloud environment, just modify the terraform.tfvars file and increase the number of storage servers (the value of the oss.node_countvariable) as required:
| Code Block | ||||
|---|---|---|---|---|
| ||||
$ diff -u terraform.tfvars.orig terraform.tfvars
@@ -217,7 +217,7 @@
 oss = {
   node_type           = "Standard_D16s_v3"
-  node_count          = 6
+  node_count          = 12
   public_ip           = false
   accelerated_network = true
} |
And then run the terraform apply command to increase the storage capacity. The available storage capacity (in GB) can be calculated by multiplying the three configuration parameters:
| Code Block | ||||
|---|---|---|---|---|
| ||||
capacity = oss.node_count * ost.disk_count * ost.disk_size |
Upgrade an existing EXAScaler Cloud environment
A software upgrade for an existing EXAScaler Cloud environment is possible by recreating the running VM instances using a new version of the OS image. And it requires some manual steps.
Create a backup copy for the existing Terraform directory (*.tf, terraform.tfvars and terraform.tfstate files):
| Code Block | ||||
|---|---|---|---|---|
| ||||
$ cd /path/to/exascaler-cloud-terraform-scripts-x.y.z/az
$ tar pcfz backup.tgz *.tf terraform.tfvars terraform.tfstate |
Update Terraform scripts using the latest available EXAScaler Cloud Terraform scripts:
| Code Block | ||||
|---|---|---|---|---|
| ||||
$ cd /path/to
$ curl -sL https://github.com/DDNStorage/exascaler-cloud-terraform/archive/refs/tags/scripts/2.2.2.tar.gz | tar xz
$ cd exascaler-cloud-terraform-scripts-2.2.2/az |
Copy the terraform.tfstate file from the existing Terraform directory:| Code Block | ||||
|---|---|---|---|---|
| ||||
$ cp -iv /path/to/exascaler-cloud-terraform-scripts-x.y.z/az/terraform.tfstate . |
Review and update the terraform.tfvars file using configuration options for the existing environment:
| Code Block | ||||
|---|---|---|---|---|
| ||||
$ diff -u  /path/to/exascaler-cloud-terraform-scripts-x.y.z/az/terraform.tfvars terraform.tfvars
$ vi terraform.tfvars |
Review the execution plan to make sure all changes are expected:
| Code Block | ||||
|---|---|---|---|---|
| ||||
% terraform plan |
Unmount the existing EXAScaler Cloud filesystem using the provided exascaler-cloud-ctl script. This step is required to ensure data consistency during the upgrade:
| Code Block | ||||
|---|---|---|---|---|
| ||||
$ scripts/exascaler-cloud-ctl

Usage:

List resource groups : ./scripts/exascaler-cloud-ctl list
List deployments     : ./scripts/exascaler-cloud-ctl <resource_group> list
List instances       : ./scripts/exascaler-cloud-ctl <resource_group> <deployment> list
Stop instances       : ./scripts/exascaler-cloud-ctl <resource_group> <deployment> stop
Start instances      : ./scripts/exascaler-cloud-ctl <resource_group> <deployment> start
Unmount filesystem   : ./scripts/exascaler-cloud-ctl <resource_group> <deployment> umount

$ scripts/exascaler-cloud-ctl list
Name                                 Location    Status
-----------------------------------  ----------  ---------
exascaler-cloud-f7cd-resource-group  eastus      Succeeded
NetworkWatcherRG                     westus      Succeeded

$ scripts/exascaler-cloud-ctl exascaler-cloud-f7cd-resource-group list
Name                            Created                    Status
------------------------------  -------------------------  ---------
exascaler-cloud-f7cd            2021-08-21T01:19:36+00:00  Succeeded

$ scripts/exascaler-cloud-ctl exascaler-cloud-f7cd-resource-group exascaler-cloud-f7cd umount
Umount compute client exascaler-cloud-f7cd-cls0
Umount compute client exascaler-cloud-f7cd-cls1
Umount storage server exascaler-cloud-f7cd-oss0
Umount storage server exascaler-cloud-f7cd-oss1
Umount storage server exascaler-cloud-f7cd-oss2
Umount storage server exascaler-cloud-f7cd-oss3
Umount metadata server exascaler-cloud-f7cd-mds0
Umount management server exascaler-cloud-f7cd-mgs0 |
Apply the changes required to upgrade the existing EXAScaler Cloud environment by recreating all instances using the latest version of EXAScaler Cloud:
| Code Block | ||||
|---|---|---|---|---|
| ||||
$ terraform apply
...
  Enter a value: yes
...

Outputs:

Apply complete! Resources: 18 added, 8 changed, 16 destroyed.

Outputs:

azure_dashboard = "https://portal.azure.com/#@753b6e26-6fd3-43e6-8248-3f1735d59bb4/dashboard/arm/subscriptions/9978cd1b-936a-4296-8061-67c9d963dd40/resourceGroups/exascaler-cloud-f7cd-resource-group/providers/Microsoft.Portal/dashboards/exascaler-cloud-f7cd-dashboard"

http_console = "http://exascaler-cloud-f7cd-mgs0.eastus.cloudapp.azure.com"

mount_command = "mount -t lustre 10.0.0.11@tcp:/exacloud /mnt/exacloud"

private_addresses = {
  "exascaler-cloud-f7cd-cls0" = "10.0.0.6"
  "exascaler-cloud-f7cd-cls1" = "10.0.0.7"
  "exascaler-cloud-f7cd-mds0" = "10.0.0.8"
  "exascaler-cloud-f7cd-mgs0" = "10.0.0.11"
  "exascaler-cloud-f7cd-oss0" = "10.0.0.9"
  "exascaler-cloud-f7cd-oss1" = "10.0.0.4"
  "exascaler-cloud-f7cd-oss2" = "10.0.0.10"
  "exascaler-cloud-f7cd-oss3" = "10.0.0.5"
}

ssh_console = {
  "exascaler-cloud-f7cd-mgs0" = "ssh -A stack@exascaler-cloud-f7cd-mgs0.eastus.cloudapp.azure.com"
} |
Steps to destroy the EXAScaler Cloud environment
Destroy the EXAScaler Cloud environment:
| Code Block | ||||
|---|---|---|---|---|
| ||||
$ terraform destroy
...
  Enter a value: yes
...
Destroy complete! Resources: 103 destroyed. |
How to access a deployment
To remote access the EXAScaler Cloud deployment (management, metadata, storage servers and compute clients), we must go through the management server public IP address, using the command.
And then using the management server console as a jump host we can open a SSH sessions to all other servers.
| Code Block | ||||
|---|---|---|---|---|
| ||||
localhost$ eval $(ssh-agent)
Agent pid 5095

localhost$ ssh-add
Identity added: /Users/deiter/.ssh/id_rsa (/Users/deiter/.ssh/id_rsa)

localhost$ ssh -A stack@20.62.171.73
Last login: Tue Aug 24 19:11:18 2021 from 181.241.16.227

[stack@exascaler-cloud-65f1-mgs0 ~]$ loci hosts
10.0.0.7	exascaler-cloud-65f1-cls0
10.0.0.5	exascaler-cloud-65f1-cls1
10.0.0.8	exascaler-cloud-65f1-cls2
10.0.0.13	exascaler-cloud-65f1-cls3
10.0.0.12	exascaler-cloud-65f1-mds0
10.0.0.11	exascaler-cloud-65f1-mgs0
10.0.0.10	exascaler-cloud-65f1-oss0
10.0.0.4	exascaler-cloud-65f1-oss1
10.0.0.6	exascaler-cloud-65f1-oss2
10.0.0.9	exascaler-cloud-65f1-oss3

[stack@exascaler-cloud-65f1-mgs0 ~]$ ssh exascaler-cloud-65f1-cls0

[stack@exascaler-cloud-65f1-cls0 ~]$ lfs df
UUID                   1K-blocks        Used   Available Use% Mounted on
exacloud-MDT0000_UUID   315302464        5744   309928012   1% /mnt/exacloud[MDT:0]
exacloud-OST0000_UUID  3181466888   570662088  2578541648  19% /mnt/exacloud[OST:0]
exacloud-OST0001_UUID  3181466888   590910696  2558305972  19% /mnt/exacloud[OST:1]
exacloud-OST0002_UUID  3181466888   580374740  2568825852  19% /mnt/exacloud[OST:2]
exacloud-OST0003_UUID  3181466888   570645704  2578552816  19% /mnt/exacloud[OST:3]

filesystem_summary:  12725867552  2312593228 10284226288  19% /mnt/exacloud
|
How to install new EXAScaler Cloud clients
New EXAScaler Cloud client instances must be in the same location and connected to the virtual network and subnet. The process of installing and configuring new clients can be performed automatically. All required information is contained in the Terraform output. To configure EXAScaler Cloud filesystem on a new client instance create a configuration file /etc/exascaler-cloud-client.conf using the actual IP address of the management server:
| Code Block | ||||
|---|---|---|---|---|
| ||||
{
    "MountConfig": {
        "ClientDevice": "10.0.0.10@tcp:/exacloud",
        "Mountpoint": "/mnt/exacloud",
        "PackageSource": "http://10.0.0.10/client-packages"
    }
} |
To install and setup EXAScaler Cloud filesystem on a new client run the following commands on the client with root privileges:
| Code Block | ||||
|---|---|---|---|---|
| ||||
# curl -fsSL http://10.0.0.10/exasccaler-cloud-client-$(arch) -o /usr/sbin/exascaler-cloud-client
# chmod +x /usr/sbin/exascaler-cloud-client
# exascaler-cloud-client auto setup --config /etc/exascaler-cloud-client.conf |
Ubuntu Linux
| Code Block | ||||
|---|---|---|---|---|
| ||||
# lsb_release -a
No LSB modules are available.
Distributor ID:	Ubuntu
Description:	Ubuntu 22.04 LTS
Release:	22.04
Codename:	jammy

# exascaler-cloud-client auto setup --config /etc/exascaler-cloud-client.conf
Discovering platform ... Done.
Configuring firewall rules for Lustre ... Done.
Configuring Lustre client package source ... Done.
Installing Lustre client packages and building DKMS modules ... Done.
Mounting 10.0.0.10@tcp0:/exacloud at /mnt/exacloud ... Done.

# mount -t lustre
10.0.0.10@tcp:/exacloud on /mnt/exacloud type lustre (rw,flock,user_xattr,lazystatfs,encrypt) |
RHEL, CentOS, Alma and Rocky Linux
| Code Block | ||||
|---|---|---|---|---|
| ||||
# cat /etc/redhat-release
AlmaLinux release 8.6 (Sky Tiger)

# exascaler-cloud-client auto setup --config /etc/exascaler-cloud-client.conf
Discovering platform ... Done.
Configuring firewall rules for Lustre ... Done.
Configuring Lustre client package source ... Done.
Installing Lustre client packages ... Done.
Mounting 10.0.0.10@tcp0:/exacloud at /mnt/exacloud ... Done.

# mount -t lustre
10.0.0.10@tcp:/exacloud on /mnt/exacloud type lustre (rw,seclabel,flock,user_xattr,lazystatfs,encrypt) |
How to use client-side encryption
The purpose that client-side encryption wants to serve is to be able to provide a special directory for each user, to safely store sensitive files. The goals are to protect data in transit between clients and servers, and protect data at rest.
This feature is implemented directly at the Lustre client level. Lustre client-side encryption relies on kernel fscrypt. fscrypt is a library which filesystems can hook into to support transparent encryption of files and directories. As a consequence, the key points described below are extracted from fscrypt documentation.
The client-side encryption feature is available natively on Lustre clients running a Linux distributions, including RHEL/CentOS 8.1 and later, Ubuntu 18.04 and later.
Client-side encryption supports data encryption and file and directory names encryption. Ability to encrypt file and directory names is governed by parameter named enable_filename_encryption and set to 0 by default. When this parameter is 0, new empty directories configured as encrypted use content encryption only, and not name encryption. This mode is inherited for all subdirectories and files. When enable_filename_encryption parameter is set to 1, new empty directories configured as encrypted use full encryption capabilities by encrypting file content and also file and directory names. This mode is inherited for all subdirectories and files. To set the enable_filename_encryption parameter globally for all clients, one can do on the management server:
| Code Block | ||||
|---|---|---|---|---|
| ||||
# lctl set_param -P llite.*.enable_filename_encryption=1 |
The fscrypt package is included in the EXAScaler Cloud client toolkit and can be installed using esc-client.
Steps to install Lustre client and fscrypt packages:
| Code Block | ||||
|---|---|---|---|---|
| ||||
# cat > /etc/exascaler-cloud-client.conf <<EOF
{
    "MountConfig": {
        "ClientDevice": "10.0.0.10@tcp:/exacloud",
        "Mountpoint": "/mnt/exacloud",
        "PackageSource": "http://10.0.0.10/client-packages"
    }
}
EOF

# curl -fsSL http://10.0.0.10/exascaler-cloud-client-$(arch) -o /usr/sbin/exascaler-cloud-client
# chmod +x /usr/sbin/exascaler-cloud-client
# exascaler-cloud-client auto setup --config /etc/esc-client.conf |
Output:
| Code Block | ||||
|---|---|---|---|---|
| ||||
# exascaler-cloud-client auto setup --config /etc/exascaler-cloud-client.conf
Discovering platform ... Done.
Configuring firewall rules for Lustre ... Done.
Configuring Lustre client package source ... Done.
Installing Lustre client packages ... Done.
Mounting 10.0.0.10@tcp0:/exacloud at /mnt/exacloud ... Done.

# rpm -q fscrypt lustre-client kmod-lustre-client
fscrypt-0.3.3-1.wc2.x86_64
lustre-client-2.14.0_ddn52-1.el8.x86_64
kmod-lustre-client-2.14.0_ddn52-1.el8.x86_64 |
Steps to configure client-side encryption:
| Code Block | ||||
|---|---|---|---|---|
| ||||
$ sudo fscrypt setup
Defaulting to policy_version 2 because kernel supports it.
Customizing passphrase hashing difficulty for this system...
Created global config file at "/etc/fscrypt.conf".
Allow users other than root to create fscrypt metadata on the root filesystem? (See
https://github.com/google/fscrypt#setting-up-fscrypt-on-a-filesystem) [y/N]
Metadata directories created at "/.fscrypt", writable by root only.

$ sudo fscrypt setup /mnt/exacloud
Allow users other than root to create fscrypt metadata on this filesystem? (See
https://github.com/google/fscrypt#setting-up-fscrypt-on-a-filesystem) [y/N] y
Metadata directories created at "/mnt/exacloud/.fscrypt", writable by everyone. |
Steps to encrypt directory:
| Code Block | ||||
|---|---|---|---|---|
| ||||
$ sudo install -v -d -m 0755 -o stack -g stack /mnt/exacloud/stack
install: creating directory '/mnt/exacloud/stack'

$ fscrypt encrypt /mnt/exacloud/stack
The following protector sources are available:
1 - Your login passphrase (pam_passphrase)
2 - A custom passphrase (custom_passphrase)
3 - A raw 256-bit key (raw_key)
Enter the source number for the new protector [2 - custom_passphrase]:
Enter a name for the new protector: test
Enter custom passphrase for protector "test":
Confirm passphrase:
"/mnt/exacloud/stack" is now encrypted, unlocked, and ready for use.

$ cp -v /etc/passwd /mnt/exacloud/stack/
'/etc/passwd' -> '/mnt/exacloud/stack/passwd'

$ ls -l /mnt/exacloud/stack/
total 1
-rw-r--r--. 1 stack stack 1610 Jul 13 20:34 passwd

$ md5sum /mnt/exacloud/stack/passwd
867541523c51f8cfd4af91988e9f8794 /mnt/exacloud/stack/passwd |
Lock the directory:
| Code Block | ||||
|---|---|---|---|---|
| ||||
$ fscrypt lock /mnt/exacloud/stack
"/mnt/exacloud/stack" is now locked.

$ ls -l /mnt/exacloud/stack
total 4
-rw-r--r--. 1 stack stack 4096 Jul 13 20:34 ydpdwRP7MiXzsTkYhg0mW3DNacDlsUJdJa2e9l6AQKL

$ md5sum /mnt/exacloud/stack/ydpdwRP7MiXzsTkYhg0mW3DNacDlsUJdJa2e9l6AQKL
md5sum: /mnt/exacloud/stack/ydpdwRP7MiXzsTkYhg0mW3DNacDlsUJdJa2e9l6AQKL: Required key not available |
Unlock the directory:
| Code Block | ||||
|---|---|---|---|---|
| ||||
$ fscrypt unlock /mnt/exacloud/stack
Enter custom passphrase for protector "test":
"/mnt/exacloud/stack" is now unlocked and ready for use.

$ ls -l /mnt/exacloud/stack
total 4
-rw-r--r--. 1 stack stack 1610 Jul 13 20:34 passwd

$ md5sum /mnt/exacloud/stack/passwd
867541523c51f8cfd4af91988e9f8794 /mnt/exacloud/stack/passwd |
Learn more about client-side encryption.
How to run benchmarks
Steps to run IOR benchmark on the EXAScaler Cloud deployment:
- Run ssh-agent
- Add ssh private key
- Open an SSH session to the EXAScaler Cloud management server
- Run IOR benchmark using
esc-iortool
| Code Block | ||||
|---|---|---|---|---|
| ||||
localhost$ eval $(ssh-agent)
Agent pid 5095

localhost$ ssh-add
Identity added: /Users/deiter/.ssh/id_rsa (/Users/deiter/.ssh/id_rsa)

localhost$ ssh -A stack@20.62.171.73

[stack@exascaler-cloud-65f1-mgs0 ~]$ exascaler-cloud-ior

IOR-3.3.0: MPI Coordinated Test of Parallel I/O

Began               : Wed Aug 25 14:43:01 2021
Command line        : /usr/bin/ior -C -F -e -r -w -a POSIX -b 16777216 -t 1048576 -s 251 -o /mnt/exacloud/0b21199cf9682b9d/0b21199cf9682b9d -s 512
Machine             : Linux exascaler-cloud-65f1-cls0
TestID              : 0
StartTime           : Wed Aug 25 14:43:01 2021
Path                : /mnt/exacloud/0b21199cf9682b9d
FS                  : 11.9 TiB   Used FS: 0.0%   Inodes: 96.0 Mi   Used Inodes: 0.0%

Options:
api                 : POSIX
apiVersion          :
test filename       : /mnt/exacloud/0b21199cf9682b9d/0b21199cf9682b9d
access              : file-per-process
type                : independent
segments            : 512
ordering in a file  : sequential
ordering inter file : constant task offset
task offset         : 1
nodes               : 4
tasks               : 64
clients per node    : 16
repetitions         : 1
xfersize            : 1 MiB
blocksize           : 16 MiB
aggregate filesize  : 512 GiB

Results:

access    bw(MiB/s)  IOPS       Latency(s)  block(KiB) xfer(KiB)  open(s)    wr/rd(s)   close(s)   total(s)   iter
------    ---------  ----       ----------  ---------- ---------  --------   --------   --------   --------   ----
write     1482.70    1482.70    21.52       16384      1024.00    0.014559   353.60     19.92      353.60     0
read      1480.89    1480.91    21.99       16384      1024.00    0.299514   354.03     43.40      354.04     0
remove    -          -          -           -          -          -          -          -          3.36       0

Max Write: 1482.70 MiB/sec (1554.72 MB/sec)
Max Read:  1480.89 MiB/sec (1552.83 MB/sec)

Finished            : Wed Aug 25 14:54:52 2021
|
Steps to run IO500 benchmark on the EXAScaler Cloud deployment:
- Run ssh-agent
- Add ssh private key
- Open an SSH session to the EXAScaler Cloud management server
- Get a list of EXAScaler Cloud compute hosts
- Open an SSH session to the any EXAScaler Cloud compute host
- Run IO500 benchmark using
esc-io500tool
| Code Block | ||||
|---|---|---|---|---|
| ||||
localhost$ eval $(ssh-agent)
Agent pid 5095

localhost$ ssh-add
Identity added: /Users/deiter/.ssh/id_rsa (/Users/deiter/.ssh/id_rsa)

localhost$ ssh -A stack@20.62.171.71

[stack@exascaler-cloud-2ed3-mgs0 ~]$ $ loci hosts -c
10.0.0.17   exascaler-cloud-2ed3-cls0
10.0.0.8    exascaler-cloud-2ed3-cls1
10.0.0.18   exascaler-cloud-2ed3-cls2
10.0.0.12   exascaler-cloud-2ed3-cls3
10.0.0.14   exascaler-cloud-2ed3-cls4
10.0.0.15   exascaler-cloud-2ed3-cls5
10.0.0.11   exascaler-cloud-2ed3-cls6
10.0.0.9    exascaler-cloud-2ed3-cls7
10.0.0.7    exascaler-cloud-2ed3-cls8
10.0.0.16   exascaler-cloud-2ed3-cls9

[stack@exascaler-cloud-2ed3-mgs0 ~]$ ssh -A exascaler-cloud-2ed3-cls0

[stack@exascaler-cloud-2ed3-cls0 ~]$ exascaler-cloud-io500

Start IO500 benchmark with options:

data directory:     /mnt/exacloud/071dfa36e6b20ca7/workload
hosts list:         10.0.0.17,10.0.0.9,10.0.0.14,10.0.0.8,10.0.0.12,10.0.0.5,10.0.0.11,10.0.0.19,10.0.0.18,10.0.0.7
processes per host: 16
files per process:  39637
number of tasks:    160
number of segments: 31500
block size:         4227858432
transfer size:      1048576

IO500 version io500-sc20_v3
[RESULT]       ior-easy-write        1.445976 GiB/s : time 364.894 seconds
[RESULT]    mdtest-easy-write       15.411987 kIOPS : time 304.382 seconds
[RESULT]       ior-hard-write        0.461174 GiB/s : time 410.219 seconds
[RESULT]    mdtest-hard-write        2.538281 kIOPS : time 449.131 seconds
[RESULT]                 find      583.795841 kIOPS : time 9.842 seconds
[RESULT]        ior-easy-read        1.450889 GiB/s : time 363.624 seconds
[RESULT]     mdtest-easy-stat       61.106840 kIOPS : time 75.517 seconds
[RESULT]        ior-hard-read        0.543306 GiB/s : time 348.233 seconds
[RESULT]     mdtest-hard-stat       20.753560 kIOPS : time 54.080 seconds
[RESULT]   mdtest-easy-delete        5.836530 kIOPS : time 789.832 seconds
[RESULT]     mdtest-hard-read       10.320768 kIOPS : time 108.658 seconds
[RESULT]   mdtest-hard-delete        4.647816 kIOPS : time 241.181 seconds
[SCORE] Bandwidth 0.851483 GiB/s : IOPS 17.322863 kiops : TOTAL 3.840589

/mnt/exacloud/b44731b2e4ac4fc2/sources/results
2021.06.17-20.26.19  io500-exascaler-cloud-2ed3-cls0-2021.06.17-20.26.19.tgz
|
How to collect inventory and support bundle
Steps to collect a support bundle on the EXAScaler Cloud deployment:
- Run ssh-agent
- Add ssh private key
- Open SSH session to the EXAScaler Cloud management server
- Collect a support bundle using
esc-collectortool
| Code Block | ||||
|---|---|---|---|---|
| ||||
localhost$ eval $(ssh-agent)
Agent pid 5095

localhost$ ssh-add
Identity added: /Users/deiter/.ssh/id_rsa (/Users/deiter/.ssh/id_rsa)

localhost$ ssh -A stack@20.62.171.33

[stack@exascaler-cloud-55d2-mgs0 ~]$ exascaler-cloud-collector

The following is a list of nodes to collect from:

    exascaler-cloud-55d2-cls0
    exascaler-cloud-55d2-cls1
    exascaler-cloud-55d2-cls2
    exascaler-cloud-55d2-cls3
    exascaler-cloud-55d2-cls4
    exascaler-cloud-55d2-cls5
    exascaler-cloud-55d2-cls6
    exascaler-cloud-55d2-cls7
    exascaler-cloud-55d2-cls8
    exascaler-cloud-55d2-cls9
    exascaler-cloud-55d2-mds0
    exascaler-cloud-55d2-mgs0
    exascaler-cloud-55d2-oss0
    exascaler-cloud-55d2-oss1
    exascaler-cloud-55d2-oss2
    exascaler-cloud-55d2-oss3

Connecting to nodes...

Beginning collection of sosreports from 16 nodes, collecting a maximum of 4 concurrently

Successfully captured 16 of 16 sosreports
Creating archive of sosreports...

The following archive has been created. Please provide it to your support team.
    /var/tmp/sos-collector-2021-06-18-nzsnm.tar.gz
|
Generate the inventory report by running the about_this_deployment command:
| Code Block | ||||
|---|---|---|---|---|
| ||||
localhost$ $ ssh -A stack@13.87.189.176

[stack@exascaler-cloud-7819-mgs0 ~]$ about_this_deployment
cloudName: AzurePublicCloud
subscriptionId: 9978cd1b-936a-4296-8061-67c9d963dd40
location: westus
resourceGroupName: CustomDeployment
deployment: exascaler-cloud-7819
filesystem: exacloud
capacityGB: 1024
configurationProfile: custom
instances:
- hostName: exascaler-cloud-7819-cls0
  userName: stack
  proximityPlacementGroup: exascaler-cloud-7819-proximity-placement-group
  passwordAuthentication: false
  instanceName: exascaler-cloud-7819-cls0
  instanceType: Standard_D16s_v3
  role: clt
  memoryGB: 64
  VCPUs: 16
  IOPS: 25600
  bandwidthMBps: 384
  network:
    interfaces:
    - name: exascaler-cloud-7819-cls0-network-interface
      acceleratedNetworking: true
      macAddress: 00-22-48-04-1F-A9
      ipAddresses:
      - privateIpAddress: 10.0.0.6
        subnet: exascaler-cloud-7819-subnetwork
  storage:
    image:
      offer: exascaler_cloud
      publisher: ddn-whamcloud-5345716
      sku: exascaler_cloud_523_redhat
      version: 5.2.3
    bootDisk:
      caching: ReadWrite
      sizeGB: 64
      name: exascaler-cloud-7819-cls0-boot-disk
      tier: StandardSSD_LRS
      type: E6
      IOPS: 500
      bandwidthMBps: 60
  publicKeys:
  - data: |
      ssh-rsa ssh-rsa AAAAB3NzaC1yc2EAAAADAQABAAABAQC4haGlji/jE0B35HrBKXeIxos2YN8jMP2m1+cx1G7UYnqr7c1I4wv073ubEfOQM2Cww4+CKEAQT3ZC+EW79NQuwJPAzPr2y961INN1zTYEX84ejbmydXzdWJT5u8LKgwKFkkKPzOU7tWJ2Co6rhz796siOpH1bvRg8gFt1oEk9B2fd3O3OA62zq6La0IUYkMQzTlU2b0hNvrVuX+Ea38fi18R7op7tSulystSrvjW/8fzRU8r7c8oTD8kELRh9H3zm0S8mk+Nq1fO4liXtNldnnpl3qAV9NipGXb+L9De15ogtqJE1/2wyaEdbXjqpA2BkHeUY8B2K7K6afpndR+AT stack@host
    path: /home/stack/.ssh/authorized_keys
- hostName: exascaler-cloud-7819-mds0
  userName: stack
  proximityPlacementGroup: exascaler-cloud-7819-proximity-placement-group
  passwordAuthentication: false
  instanceName: exascaler-cloud-7819-mds0
  instanceType: Standard_E8s_v3
  role: mdt
  memoryGB: 64
  VCPUs: 8
  IOPS: 12800
  bandwidthMBps: 192
  network:
    interfaces:
    - name: exascaler-cloud-7819-mds0-network-interface
      acceleratedNetworking: true
      macAddress: 00-22-48-0A-05-EE
      ipAddresses:
      - privateIpAddress: 10.0.0.7
        subnet: exascaler-cloud-7819-subnetwork
  storage:
    image:
      offer: exascaler_cloud
      publisher: ddn-whamcloud-5345716
      sku: exascaler_cloud_523_redhat
      version: 5.2.3
    bootDisk:
      caching: ReadWrite
      sizeGB: 64
      name: exascaler-cloud-7819-mds0-boot-disk
      tier: StandardSSD_LRS
      type: E6
      IOPS: 500
      bandwidthMBps: 60
    dataDisks:
    - lun: 0
      caching: None
      sizeGB: 512
      name: exascaler-cloud-7819-mds0-mdt0-disk
      tier: Premium_LRS
      type: P20
      IOPS: 2300
      bandwidthMBps: 150
  publicKeys:
  - data: |
      ssh-rsa ssh-rsa AAAAB3NzaC1yc2EAAAADAQABAAABAQC4haGlji/jE0B35HrBKXeIxos2YN8jMP2m1+cx1G7UYnqr7c1I4wv073ubEfOQM2Cww4+CKEAQT3ZC+EW79NQuwJPAzPr2y961INN1zTYEX84ejbmydXzdWJT5u8LKgwKFkkKPzOU7tWJ2Co6rhz796siOpH1bvRg8gFt1oEk9B2fd3O3OA62zq6La0IUYkMQzTlU2b0hNvrVuX+Ea38fi18R7op7tSulystSrvjW/8fzRU8r7c8oTD8kELRh9H3zm0S8mk+Nq1fO4liXtNldnnpl3qAV9NipGXb+L9De15ogtqJE1/2wyaEdbXjqpA2BkHeUY8B2K7K6afpndR+AT stack@host
    path: /home/stack/.ssh/authorized_keys
- hostName: exascaler-cloud-7819-mgs0
  userName: stack
  proximityPlacementGroup: exascaler-cloud-7819-proximity-placement-group
  passwordAuthentication: false
  instanceName: exascaler-cloud-7819-mgs0
  instanceType: Standard_F4s
  role: mgt
  memoryGB: 8
  VCPUs: 4
  IOPS: 12800
  bandwidthMBps: 192
  network:
    interfaces:
    - name: exascaler-cloud-7819-mgs0-network-interface
      acceleratedNetworking: true
      macAddress: 00-22-48-04-1B-91
      ipAddresses:
      - privateIpAddress: 10.0.0.5
        publicIpAddress: 13.87.189.176
        subnet: exascaler-cloud-7819-subnetwork
  storage:
    image:
      offer: exascaler_cloud
      publisher: ddn-whamcloud-5345716
      sku: exascaler_cloud_523_redhat
      version: 5.2.3
    bootDisk:
      caching: ReadWrite
      sizeGB: 64
      name: exascaler-cloud-7819-mgs0-boot-disk
      tier: StandardSSD_LRS
      type: E6
      IOPS: 500
      bandwidthMBps: 60
    dataDisks:
    - lun: 0
      caching: None
      sizeGB: 256
      name: exascaler-cloud-7819-mgs0-mgt0-disk
      tier: StandardSSD_LRS
      type: E15
      IOPS: 500
      bandwidthMBps: 60
    - lun: 1
      caching: None
      sizeGB: 128
      name: exascaler-cloud-7819-mgs0-mnt0-disk
      tier: StandardSSD_LRS
      type: E10
      IOPS: 500
      bandwidthMBps: 60
  publicKeys:
  - data: |
      ssh-rsa ssh-rsa AAAAB3NzaC1yc2EAAAADAQABAAABAQC4haGlji/jE0B35HrBKXeIxos2YN8jMP2m1+cx1G7UYnqr7c1I4wv073ubEfOQM2Cww4+CKEAQT3ZC+EW79NQuwJPAzPr2y961INN1zTYEX84ejbmydXzdWJT5u8LKgwKFkkKPzOU7tWJ2Co6rhz796siOpH1bvRg8gFt1oEk9B2fd3O3OA62zq6La0IUYkMQzTlU2b0hNvrVuX+Ea38fi18R7op7tSulystSrvjW/8fzRU8r7c8oTD8kELRh9H3zm0S8mk+Nq1fO4liXtNldnnpl3qAV9NipGXb+L9De15ogtqJE1/2wyaEdbXjqpA2BkHeUY8B2K7K6afpndR+AT stack@host
    path: /home/stack/.ssh/authorized_keys
- hostName: exascaler-cloud-7819-oss0
  userName: stack
  proximityPlacementGroup: exascaler-cloud-7819-proximity-placement-group
  passwordAuthentication: false
  instanceName: exascaler-cloud-7819-oss0
  instanceType: Standard_D16s_v3
  role: ost
  memoryGB: 64
  VCPUs: 16
  IOPS: 25600
  bandwidthMBps: 384
  network:
    interfaces:
    - name: exascaler-cloud-7819-oss0-network-interface
      acceleratedNetworking: true
      macAddress: 00-22-48-0A-0D-54
      ipAddresses:
      - privateIpAddress: 10.0.0.4
        subnet: exascaler-cloud-7819-subnetwork
  storage:
    image:
      offer: exascaler_cloud
      publisher: ddn-whamcloud-5345716
      sku: exascaler_cloud_523_redhat
      version: 5.2.3
    bootDisk:
      caching: ReadWrite
      sizeGB: 64
      name: exascaler-cloud-7819-oss0-boot-disk
      tier: StandardSSD_LRS
      type: E6
      IOPS: 500
      bandwidthMBps: 60
    dataDisks:
    - lun: 0
      caching: None
      sizeGB: 512
      name: exascaler-cloud-7819-oss0-ost0-disk
      tier: Standard_LRS
      type: S20
      IOPS: 500
      bandwidthMBps: 60
    - lun: 1
      caching: None
      sizeGB: 512
      name: exascaler-cloud-7819-oss0-ost1-disk
      tier: Standard_LRS
      type: S20
      IOPS: 500
      bandwidthMBps: 60
  publicKeys:
  - data: |
      ssh-rsa ssh-rsa AAAAB3NzaC1yc2EAAAADAQABAAABAQC4haGlji/jE0B35HrBKXeIxos2YN8jMP2m1+cx1G7UYnqr7c1I4wv073ubEfOQM2Cww4+CKEAQT3ZC+EW79NQuwJPAzPr2y961INN1zTYEX84ejbmydXzdWJT5u8LKgwKFkkKPzOU7tWJ2Co6rhz796siOpH1bvRg8gFt1oEk9B2fd3O3OA62zq6La0IUYkMQzTlU2b0hNvrVuX+Ea38fi18R7op7tSulystSrvjW/8fzRU8r7c8oTD8kELRh9H3zm0S8mk+Nq1fO4liXtNldnnpl3qAV9NipGXb+L9De15ogtqJE1/2wyaEdbXjqpA2BkHeUY8B2K7K6afpndR+AT stack@host
    path: /home/stack/.ssh/authorized_keys
|
How to stop and start a deployment
If you want to stop and start the servers in your EXAScaler Cloud deployment (for example, to save cost on weekends) - please use the esc-ctl script.
Prerequisites
- You need a Microsoft account
- Your system needs the Microsoft Azure CLI
Before use the Microsoft Azure CLI for Microsoft Azure, you will need to authenticate under the Microsoft account you used to log into the Microsoft Azure Portal. You will use a Microsoft account and its credentials to allow the shell script to start/stop the EXAScaler Cloud servers.
Steps to authenticate via Microsoft account
Obtains access credentials for your user account via a web-based authorization flow. When this command completes successfully, it sets the active account in the current configuration to the account specified. Learn more.
| Code Block | ||||
|---|---|---|---|---|
| ||||
$ az login |
To view the current Azure subscription ID, please use az account show command.
| Code Block | ||||
|---|---|---|---|---|
| ||||
$ az account show
{
  "environmentName": "AzureCloud",
  "homeTenantId": "00000000-0000-0000-0000-000000000000",
  "id": "XXXXXXXX-XXXX-XXXX-XXXX-XXXXXXXXXXXX",
  "isDefault": true,
  "managedByTenants": [],
  "name": "Pay-As-You-Go",
  "state": "Enabled",
  "tenantId": "00000000-0000-0000-0000-000000000000",
  "user": {
    "name": "user@domain.com",
    "type": "user"
  }
} |
if you have more than one subscriptions - please set the default subscription. Learn more.
| Code Block | ||||
|---|---|---|---|---|
| ||||
$ az account set --subscription XXXXXXXX-XXXX-XXXX-XXXX-XXXXXXXXXXXX |
List of existing resource groups
| Code Block | ||||
|---|---|---|---|---|
| ||||
$ scripts/exascaler-cloud-ctl list
Name              Location    Status
----------------  ----------  ---------
EXAScaler-Cloud eastus Succeeded |
List of existing deployments for the given resource group
| Code Block | ||||
|---|---|---|---|---|
| ||||
$ scripts/exascaler-cloud-ctl EXAScaler-Cloud list
Name                            Created                    Status
------------------------------  -------------------------  ---------
exascaler-cloud-65f1 2021-08-24T18:56:27+00:00 Succeeded |
List of EXAScaler Cloud servers for the given deployment
| Code Block | ||||
|---|---|---|---|---|
| ||||
$ scripts/exascaler-cloud-ctl EXAScaler-Cloud exascaler-cloud-65f1 list
Name                       Size              Role    Version    PrivateIP    PublicIP      Status
-------------------------  ----------------  ------  ---------  -----------  ------------  ----------
exascaler-cloud-65f1-cls0  Standard_D16s_v3  clt     5.2.3      10.0.0.7                   VM running
exascaler-cloud-65f1-cls1  Standard_D16s_v3  clt     5.2.3      10.0.0.5                   VM running
exascaler-cloud-65f1-cls2  Standard_D16s_v3  clt     5.2.3      10.0.0.8                   VM running
exascaler-cloud-65f1-cls3  Standard_D16s_v3  clt     5.2.3      10.0.0.13                  VM running
exascaler-cloud-65f1-mds0  Standard_E8s_v3   mdt     5.2.3      10.0.0.12                  VM running
exascaler-cloud-65f1-mgs0  Standard_F4s      mgt     5.2.3      10.0.0.11    20.62.171.73  VM running
exascaler-cloud-65f1-oss0  Standard_D16s_v3  ost     5.2.3      10.0.0.10                  VM running
exascaler-cloud-65f1-oss1  Standard_D16s_v3  ost     5.2.3      10.0.0.4                   VM running
exascaler-cloud-65f1-oss2  Standard_D16s_v3  ost     5.2.3      10.0.0.6                   VM running
exascaler-cloud-65f1-oss3 Standard_D16s_v3 ost 5.2.3 10.0.0.9 VM running |
Stop the EXAScaler Cloud servers
| Code Block | ||||
|---|---|---|---|---|
| ||||
$ scripts/exascaler-cloud-ctl EXAScaler-Cloud exascaler-cloud-65f1 stop
Stop compute client exascaler-cloud-65f1-cls0
Stop compute client exascaler-cloud-65f1-cls1
Stop compute client exascaler-cloud-65f1-cls2
Stop compute client exascaler-cloud-65f1-cls3
Stop storage server exascaler-cloud-65f1-oss0
Stop storage server exascaler-cloud-65f1-oss1
Stop storage server exascaler-cloud-65f1-oss2
Stop storage server exascaler-cloud-65f1-oss3
Stop metadata server exascaler-cloud-65f1-mds0
Stop management server exascaler-cloud-65f1-mgs0 |
Start the EXAScaler Cloud servers
| Code Block | ||||
|---|---|---|---|---|
| ||||
$ scripts/exascaler-cloud-ctl EXAScaler-Cloud exascaler-cloud-65f1 start
Start management server exascaler-cloud-65f1-mgs0
Start metadata server exascaler-cloud-65f1-mds0
Start storage server exascaler-cloud-65f1-oss0
Start storage server exascaler-cloud-65f1-oss1
Start storage server exascaler-cloud-65f1-oss2
Start storage server exascaler-cloud-65f1-oss3
Start compute client exascaler-cloud-65f1-cls0
Start compute client exascaler-cloud-65f1-cls1
Start compute client exascaler-cloud-65f1-cls2
Start compute client exascaler-cloud-65f1-cls3 |
All required services will automatically start and the filesystem will be mounted and available on all compute clients.
How to upgrade an existing deployment
| Anchor | ||||
|---|---|---|---|---|
|
A software upgrade for an existing EXAScaler Cloud deployment is possible by creating a new deployment using a copy of the existing file system.
To upgrade the existing EXAScaler Cloud deployment you can use the standard EXAScaler Cloud Azure application by selecting the "Upgrade" value for the "Deployment type" option.
All running instances must be shut down for the existing EXAScaler Cloud deployment before performing the upgrade, this is required to ensure data consistency while creating a copy of existing data:
| Code Block | ||||
|---|---|---|---|---|
| ||||
$ scripts/exascaler-cloud-ctl list
Name              Location    Status
----------------  ----------  ---------
EXAScaler-Cloud   eastus      Succeeded

$ scripts/exascaler-cloud-ctl EXAScaler-Cloud list
Name                            Created                    Status
------------------------------  -------------------------  ---------
exascaler-cloud-65f1            2021-08-24T18:56:27+00:00  Succeeded

$ scripts/exascaler-cloud-ctl EXAScaler-Cloud exascaler-cloud-65f1 stop
Stop compute client exascaler-cloud-65f1-cls0
Stop compute client exascaler-cloud-65f1-cls1
Stop compute client exascaler-cloud-65f1-cls2
Stop compute client exascaler-cloud-65f1-cls3
Stop storage server exascaler-cloud-65f1-oss0
Stop storage server exascaler-cloud-65f1-oss1
Stop storage server exascaler-cloud-65f1-oss2
Stop storage server exascaler-cloud-65f1-oss3
Stop metadata server exascaler-cloud-65f1-mds0
Stop management server exascaler-cloud-65f1-mgs0 |
Then launch the standard EXAScaler Cloud Azure application using the Azure Marketplace
➊ Basics step
- specify your Azure subscription
- new resource group
- region
- and select "Upgrade" value for the "Deployment type" option:

➋ Deployment step
Select an existing EXAScaler Cloud deployment:

Base OS image (you can upgrade Red Hat Enterprise Linux to CentOS Linux and vice versa) and availability options:

➌ Security step
Specify user name and authentication parameters (you can use user name and authentication parameters other than the existing environment):
➍ Network step
Specify network and subnet (you can create a new one) and public IP addresses options:

➎ Management step
You can change the type of management server and the type of management and monitoring targets, but the size of the targets must be the same as in the existing environment:

➏ Metadata step
You can change the type of metadata server and the type of metadata target, but the size of the target must be the same as in the existing environment:

➐ Storage step
You can change the type of storage servers and the type of storage targets, but the number of the storage servers and the number and size of the storage targets must be the same as in the existing environment:

➑ Client step
You can change the type of compute clients and the type of compute targets, but the number and size of the compute targets must be the same as in the existing environment:

➒ Review + create step
At this stage Microsoft Azure checks all selected options against the subscription quota. And we can review and check all the parameters we have chosen before starting the deployment:


And then press a "Create" button to upgrade the existing deployment. A new EXAScaler Cloud deployment will be created in accordance with the selected parameters, and all new targets will be created as copies of targets in the existing EXAScaler Cloud deployment.TODO
Overview
Content Tools